Tutorial: Searching and Analysing Automatic Speech Recognition (ASR) transcripts as Data Layer in Television Collections

Tutorial Description, Case and Objective
Automatic Speech Recognition
is a technique used to identify and transcribe human speech into text. Like platforms for audiovisual contents (YouTube, Netflix), the Media Suite provides a search functionality to search within ASR-transcript of television and radio. ASR becomes a ‘textual’ access point to the spoken contents of audio or audiovisual files, in addition to archival metadata.
This tutorial introduces you to analyzing the Media Suite’s Automatic Speech Recognition data layer for television studies and/or television history research. Upon completing this tutorial, you will have learned about:
-
Using ASR to render audiovisual material into transcribed text, in particular making use of the Media Suite’s Search, Inspect and Compare tools
-
The possibilities and limitations of ASR for research
-
Analysing ASR with natural language processing and “distant reading” techniques
-
The impact of ASR in understanding audiovisual data, and on some of the challenges it brings with regards to research transparency - for instance in cases when metadata is incomplete, or imperfect.
-
Practicing what in media studies is called “tool criticism” ( Koolen, van Gorp and Ossenbruggen, 2018 ; van Es, Wieringa and Tobias Schäfer, 2018 ), which is the ability to understand (and critique) the role of digital research instruments (their construction, design, organisation) in our understanding and perception of the information we access through them.
In this tutorial you will be exploring one collection: the Netherlands Institute for Sound and Vision Television collection, which is one of the collections in the Media Suite that is searchable through ASR data.
Prerequisites
It is a prerequisite for completing this tutorial that you know how to log in to the Media Suite, how to create a user project in the environment and that you know how to search and bookmark collection items. These steps are explained in the two tutorials “Logging in, Workspace and Creating a User Project” which can be accessed here and “Searching and Bookmarking for Television History” which can be accessed here .
Acknowledgements
Supervision, editing and additional text: Christian Olesen and Jasmijn van Gorp.
Steps
1. Select collection and ASR data layer
-
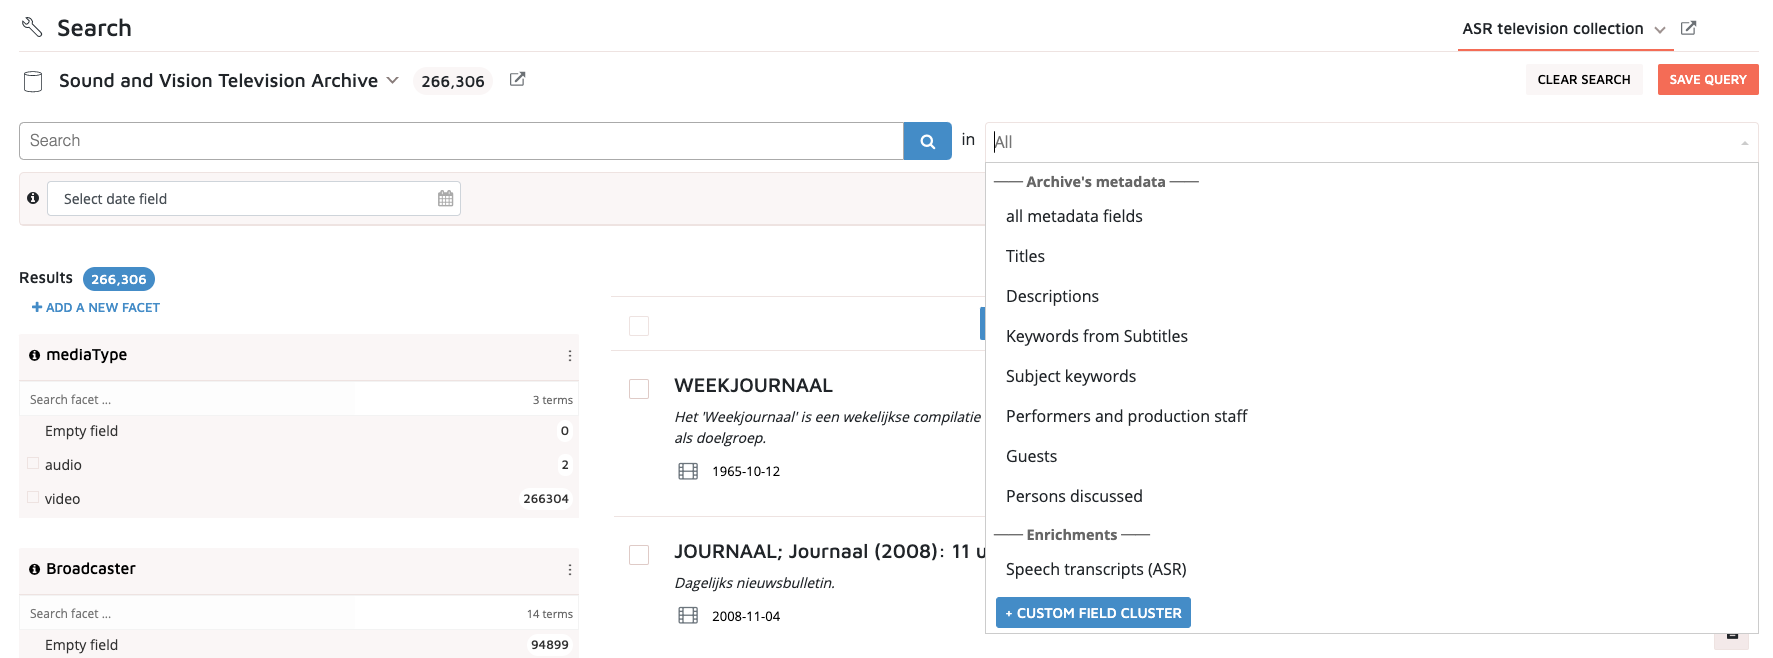
Select collection . To begin querying ASR data, you first need to select a collection. Different collections contain different information, so you will have to justify your choice within the parameters of your research project. In the Media Suite it makes the most sense to search ASR in the radio and television collections. In this tutorial, we will focus on the Sound and Vision Television Archive and on the topic of migrants and/or migration. Please make sure to select this collection in the search interface before beginning your search.
-
The Media Suite allows you to target your searches using different Search layers . Each search layer gives you access to different aspects of the Media Suite’s data – for example, an audio’s production date, place of airing, etc. These descriptive categories are also referred to as “metadata”. They are “meta” in the sense that they describe the contents of given data.
-
In the metadata layers, you will also find numerous representations of dates . There are fifteen date fields in total; none has been completely filled out over time. You may choose a standard format such as Date, sorting (preferred) : this format is useful because it automatically sorts your results by relevance, and skips empty fields. In order to follow Step 3 “Metadata analysis using timeline chart”
-
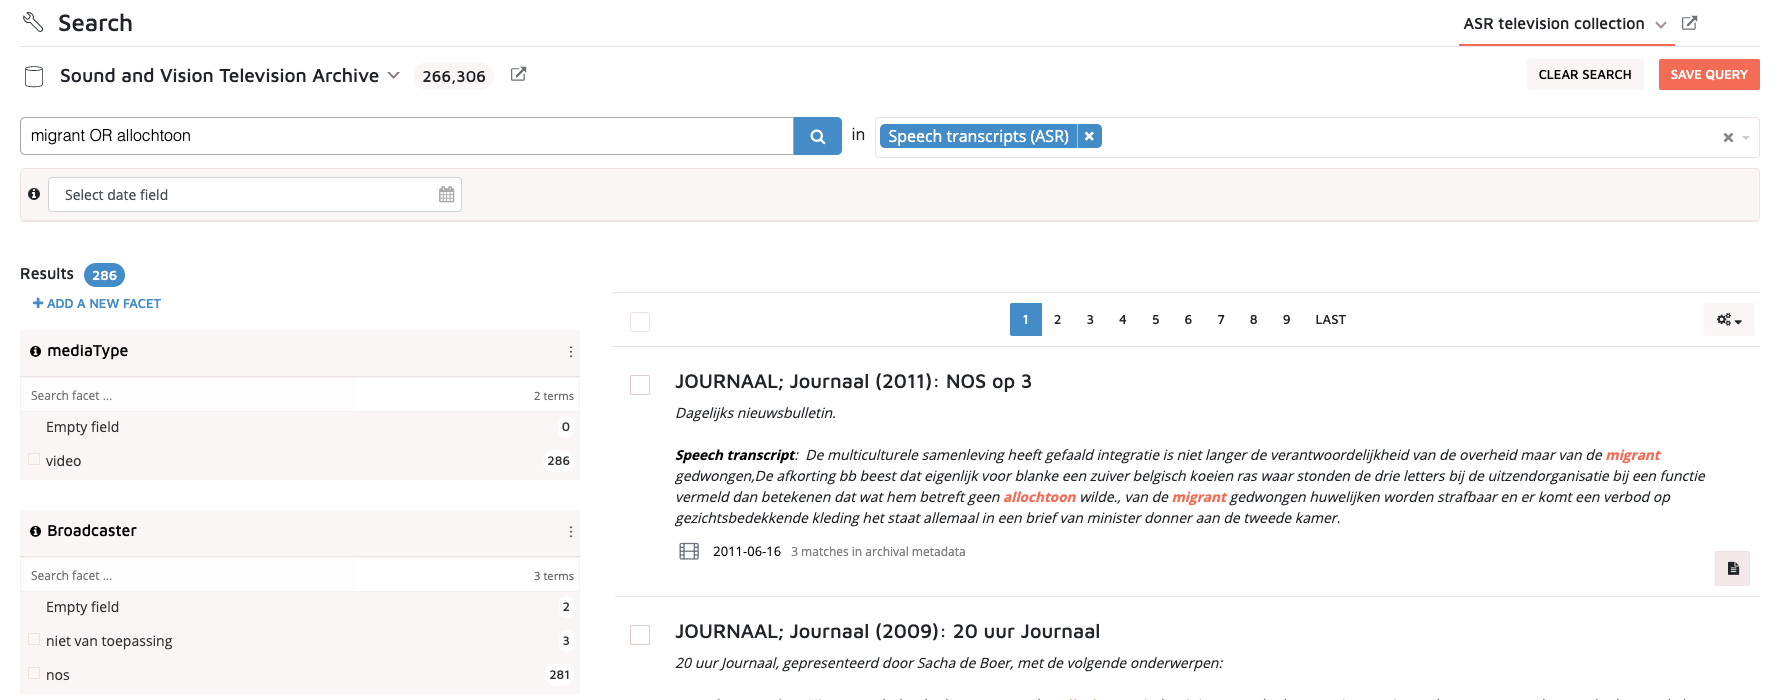
Below the metadata layers, you will find ASR transcriptions. Depending on the collection you choose, these are the automatically recognised or transcribed spoken words of radio and television programs. In this tutorial we will be working with these. Before continuing to the next step it is important that you have selected the ASR data search option in the search interface. You can do this in the bar on the right-hand side of the search field. Click on the bar and choose “Speech transcripts (ASR)” at the bottom of the drop-down menu that appears when clicking (see image above). Once you have selected to search in ASR you are ready to query.
2. Design a query
-
Before you begin querying, it is good to take a moment to consider how you design your queries. As you know from your daily Google searches, the word you choose and its phrasings determine (for the most part) the results you get . This applies especially to more politically charged queries: different phrasings speak to different political groups over different periods of time. For example, in relation to a topic such as migrants and migration, “allochtoon” is a word that some people have stopped using, while others have maintained the use of it for specific political reasons.
-
As ASR data are in Dutch, we recommend considering a query that makes sense in the Dutch language and speaks to Dutch (media) history.
-
When querying, keep in mind that the Media Suite supports Boolean operators . This means that you can search not just one but many terms at once. For example, if you are interested in researching media coverage of migrants, you may consider searching for different framings of the term “migrant”, such as “allochtoon” or “vluchtelingen”. This could be expressed in the query “migrant OR allochtoon OR vluchtelingen”. Alternatively, if you would like all three terms to be mentioned in every search result you may use the query “migrant AND allochtoon AND vluchtelingen”.
-
Try querying for yourself and find word combinations that give useful results. Take a moment to reflect on what works well for your research project and what does not.
-
After you have tried out different search queries, you may consider saving one or more of your queries , so you can later compare them with other queries and their respective search results. Saving queries means saving query parameters (search term, filters, ordering options). For a detailed explanation of how to do this, see Step 4, “Store and retrieve queries” in Searching and Bookmarking for Television History.
3. Metadata analysis using timeline chart
-
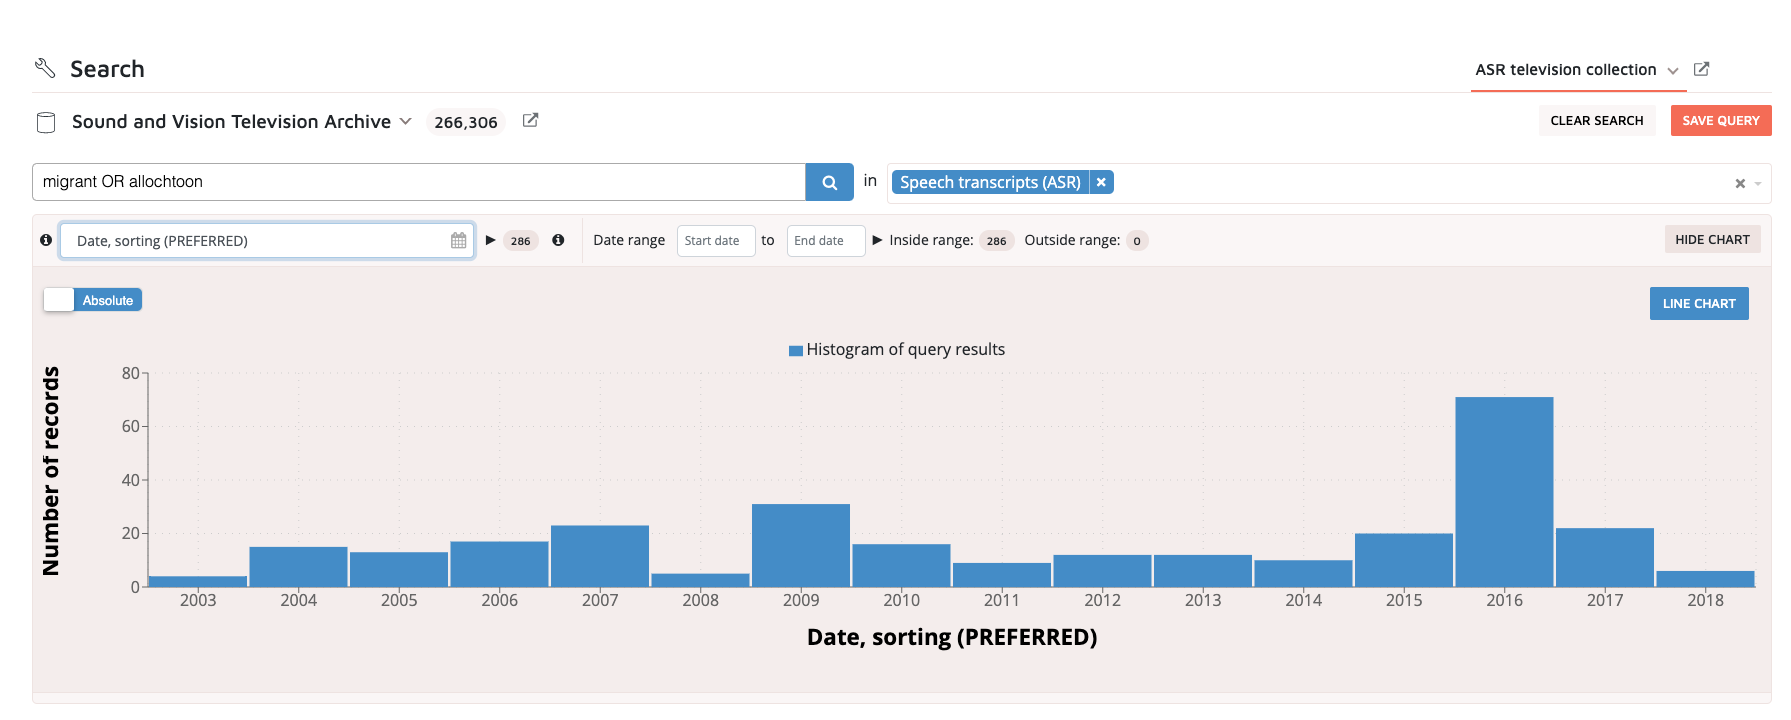
After having searched the Sound & Vision Television Collection’s ASR data and saved queries, you may analyze your results from a “distant reading” perspective . In order to do so, you can use the Media Suite’s timeline chart to visualise changes in your search results over time. In order to make the timeline chart appear, click on the “SHOW CHART”-button below the bar on the right-hand side, the one in which you chose the ASR data as a search layer. Clicking the button makes the chart appear (see image above).
-
Once you have made the chart appear, you may use the visualisation as a starting point for considering the following:
-
What patterns do you see in the data?
-
What can you conclude from the visualisation about the public debate on migration in Dutch television?
-
To what degree may you confidently rely on your observations based on this visualisation?
-
-
Are there counterintuitive aspects about the visualisation, what might it not show? Take a moment to reflect on these points before proceeding to the next step
4. ASR data analysis using Inspector Tool
-
Oftentimes, the metadata fields you use to obtain search results are incomplete, for instance as a consequence of being completed manually under varying circumstances which may make the metadata inconsistent. This also applies to ASR data. At first sight, gaps in (meta)data are not visible when searching. To find out more about your metadata fields and consider potential gaps in them, you may consider inspecting them. You can use the Media Suite’s Inspector Tool for this.
-
To demonstrate how the Inspector Tool works we will be considering the completeness of the ASR data in relation to your search queries and the date field “Date, sorting (PREFERRED)”.
-
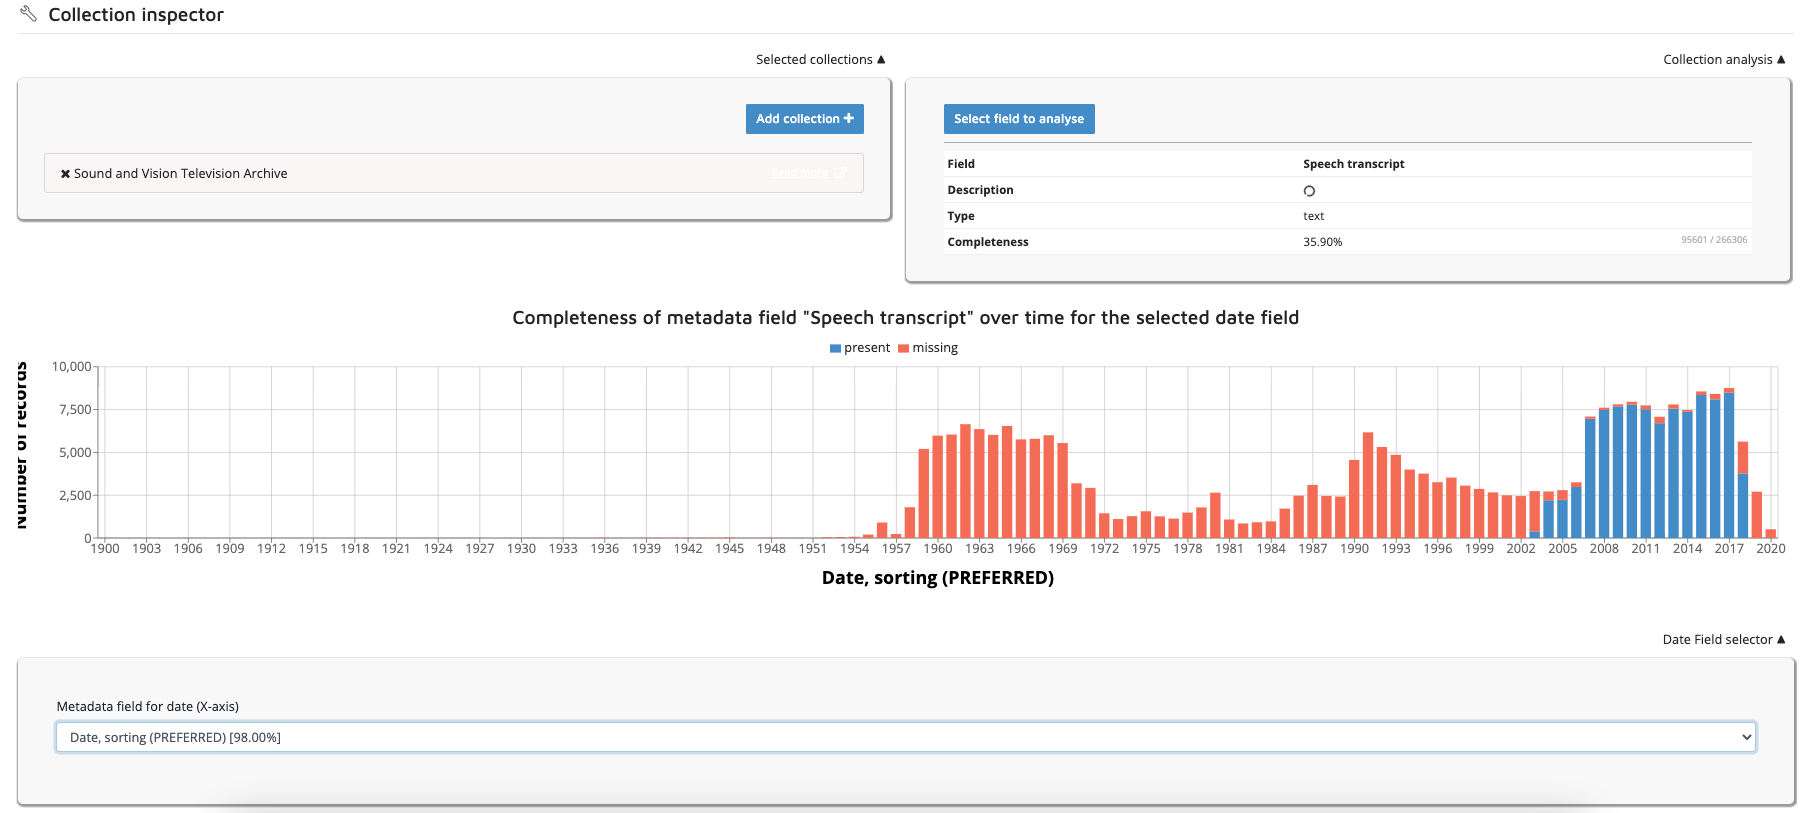
Open the Inspector Tool and select collection - in our case Sound & Vision Television Archive. Once you have selected the collection, click on it in the box on your right-hand side. This makes a box appear on the right-hand side with the option “Select field to analyse” .
-
Click on the “Select field” option. An overview of metadata fields appears. In the overview, you will see that the inspector Tool can be used to explore the completeness of all the collection data fields, including ASR data for the collection you research as well as for collections for which ASR data exist. To test this, you may choose the field “Speech transcript”.
-
Upon choosing a field, a timeline chart appears in which the completeness of ASR data is mapped onto data from the field “Date, sorting (PREFERRED)” (see image above). The blue colour applies to items that have speech transcript data, while the orange colour is used to indicate items that do not have ASR data. To change which field the completeness of the ASR data is mapped onto, you may choose a different field from the “Metadata field for date (X-axis)”-dropdown menu in the box “Date Field Selector” below the timeline chart visualisation.
-
Having used the Inspector Tool to analyze these fields, reflect on the implications of the quantities of ASR files in your search results . You may consider the following points:
-
How does the amount of available ASR data and metadata available influence your results?
-
How certain are you about when specific terms - for instance a term such as “migrant” - was mentioned for the first time on Dutch Television?
-
How reliable are the ASR data for your research and what may you conclude based on it?
-
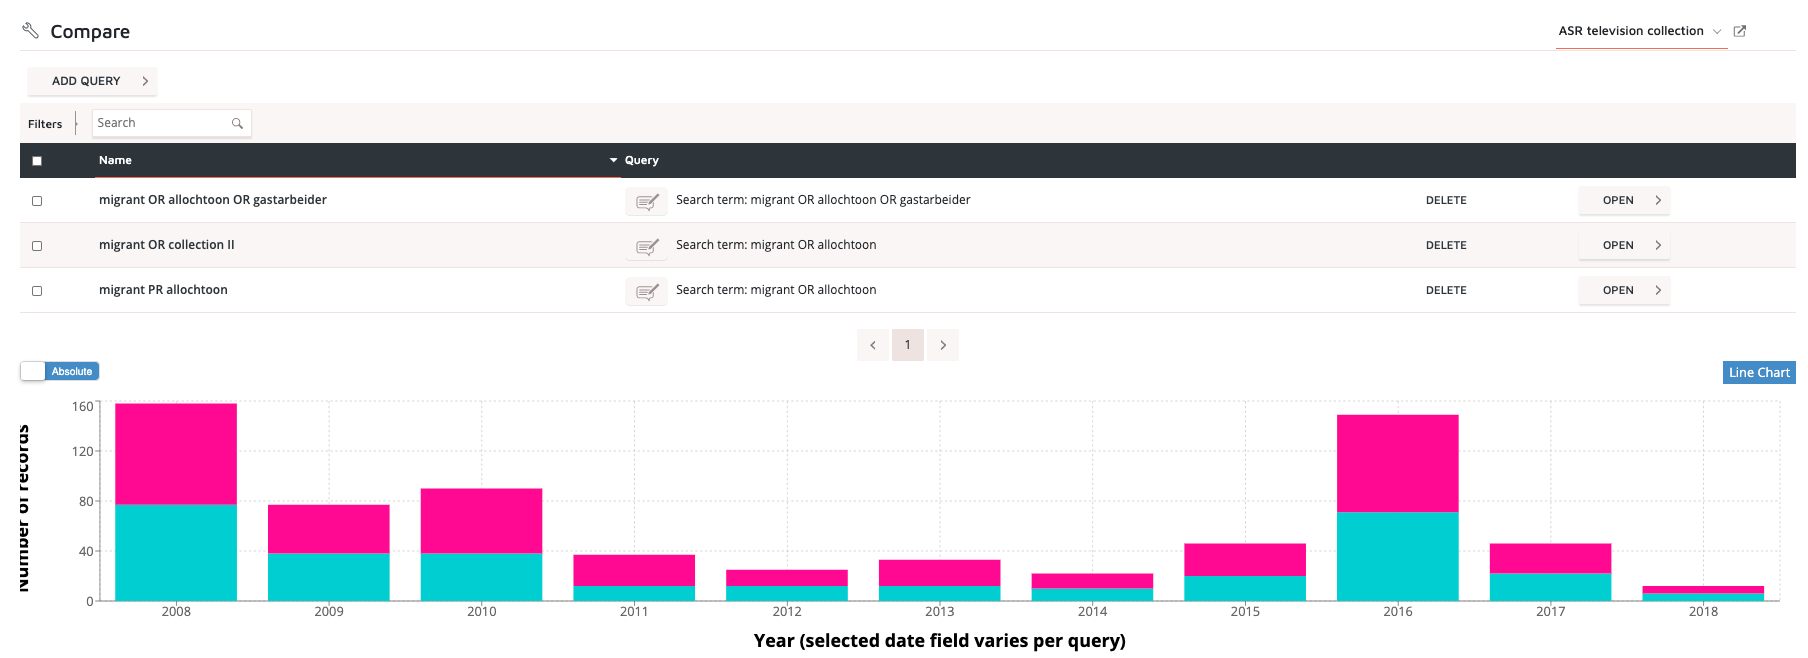
5. Metadata comparison using the Compare Tool
-
In order to further reflect on the points in the previous steps it may be helpful to compare the results you get based on ASR data with results obtained using collection metadata.
-
In order to make such a comparison, query the collection a second time, this time using archival metadata descriptions . These descriptions include fields like item summaries (short, detailed, shot-by-shot), among others. The metadata are created manually by archivists after content inspection. Use the same queries as before, but this time using a collection metadata search layer, fx, descriptions. Save one or more queries.
-
Now you may compare the results of your different queries using the Compare Tool . To do so, hover over Tools and choose “Compare”. This directs you to an overview of your queries made within your user project. On the left-hand side of each query you may tick a box in order to select the query for comparison. Once you have selected the queries you wish to compare, a bar appears at the bottom of your screen with a “COMPARE”-button. Click the button.** A timeline chart visualisation appears that allows you to compare the amount of results - both absolute and relative - for the different queries chronologically** (see image above). In this visualisation the different visualisations have been colour-coded so as to allow distinguishing between them (hover over the bars to see which is which query)
-
Based on this visualisation ask yourself: do the two sets of search results have similar patterns, do they result in the same amount of results or are there significant differences?
-
Well done! Now you know how to search, inspect and compare ASR data in the Media Suite in relation to collection metadata and critically assess its value for your research project.