Tutorial: Finding and Bookmarking Oral History Interviews
Tutorial for CLARIAH Media Suite V4.12 and up Tutorial made by Max Broekhuizen, April 2020
Tutorial Description, Case and Objectives
In this tutorial, you will learn how to compile a corpus of oral history interviews around a specific theme, using the Media Suite search tool and User Project. With this tutorial, you will learn:
-
How to search for individual oral history interviews in the Media Suite
-
How to bookmark items into a personal user project as to create a corpus of interviews
-
How to use the Media Suite for approaching interviews on a thematic level , rather than interacting with them through different collections.
Before beginning this tutorial, it is a prerequisite that you know how to log in to and create a user project in the Media Suite. If you are not yet familiar with these aspects of using the Media Suite, please consult the tutorial “Logging In, Workspace and Creating a User Project”.
In this tutorial, you will be working with the aggregated Oral History Collections. These collections that are part of this are harvested from DANS, and gather roughly 3000 oral history interviews on the Media Suite. Because of the different collections, the interviews consist of a wide variety of thematic collections. To read more about what the aggregation of these collections and their contents means, click here.
The main take-away from this tutorial should be that the Media Suite allows you to create a corpus of interviews on the basis of subject, regardless to which collections the interviews initially belonged. To demonstrate this point, the tutorial will use the subject of women’s emancipation as an example. The emancipation of women is discussed in a number of interviews, but since it is such a broad subject, there is not one specific interview collection to do with women’s emancipation. To get a broad sense of what the emancipation of women entailed from interviews, we will use the search tool to collect an as diverse as possible corpus of interviews about the subject.
If you are not yet familiar with working in the Media Suite, it is recommended to follow this tutorial verbatim. If, however, you feel comfortable experimenting it is highly encouraged to do so, as this may be the best way to get a sense of how the search tool works and how to get relevant results that best meet your needs.
This tutorial was also turned into a video series, with one video presenting each step. These videos will be embedded in this text. It is up to you if you want to watch each step’s video, read its text, or do both.
Steps
1. Search tool and Oral History (aggregated collections)
Finding and Bookmarking Oral History Interviews (Part 1 of 6) from Media Suite on Vimeo .
-
Hover over the “Tools” tab
-
Select “Search” from the drop-down menu
-
Set active project in upper right corner and choose the user project you wish to add items to
-
Click “Select Collection” in the upper left corner
-
Select Oral History (aggregated collections) from the drop-down menu, for which you might have to scroll down
2. Finding Items in the aggregated Oral History collections
Finding and Bookmarking Oral History Interviews (Part 2 of 6) from Media Suite on Vimeo .
In this step, you will learn to use the search tool to find interviews pertaining to a certain subject. In this step you will not yet catalogue specific interviews, but instead explore the search results and get to know the search tool.
-
Use single search terms that relate to women’s emancipation. To get started, you may try the following: feminisme , vrouwelijk , stemrecht , but feel free to use your own search terms as you please.
-
Search for common phrases with multiple words. To get started, you may try the following: huiselijk geweld , dolle mina , hoger onderwijs , but feel free to use your own search terms as you please.
-
Try the above phrases both with and without “quotation marks” . Take note of the difference this makes in terms of the search results you get.
-
Search using other boolean query operators to combine different terms. Boolean query operators can combine search terms to make your queries more specific. An example is quotation marks, but there are more. For a quick explanation of how these work, click here . You may try the following: vrouw AND werk , onderwijs NOT hij , vrouwen* , but feel free to use different operators as you please.
-
Compare results of searching with and without boolean operators. Notice the difference in both the amount of results and the results themselves.
-
Take note of search queries with satisfying results. These will be used in the next steps.
3. Search queries and facets
Finding and Bookmarking Oral History Interviews (Part 3 of 6) from Media Suite on Vimeo .
In the previous step, you found out which search queries produced fruitful results, and which did not. There is more to the search tool than just querying terms, however: it is possible to use facets to narrow down your search results further.
-
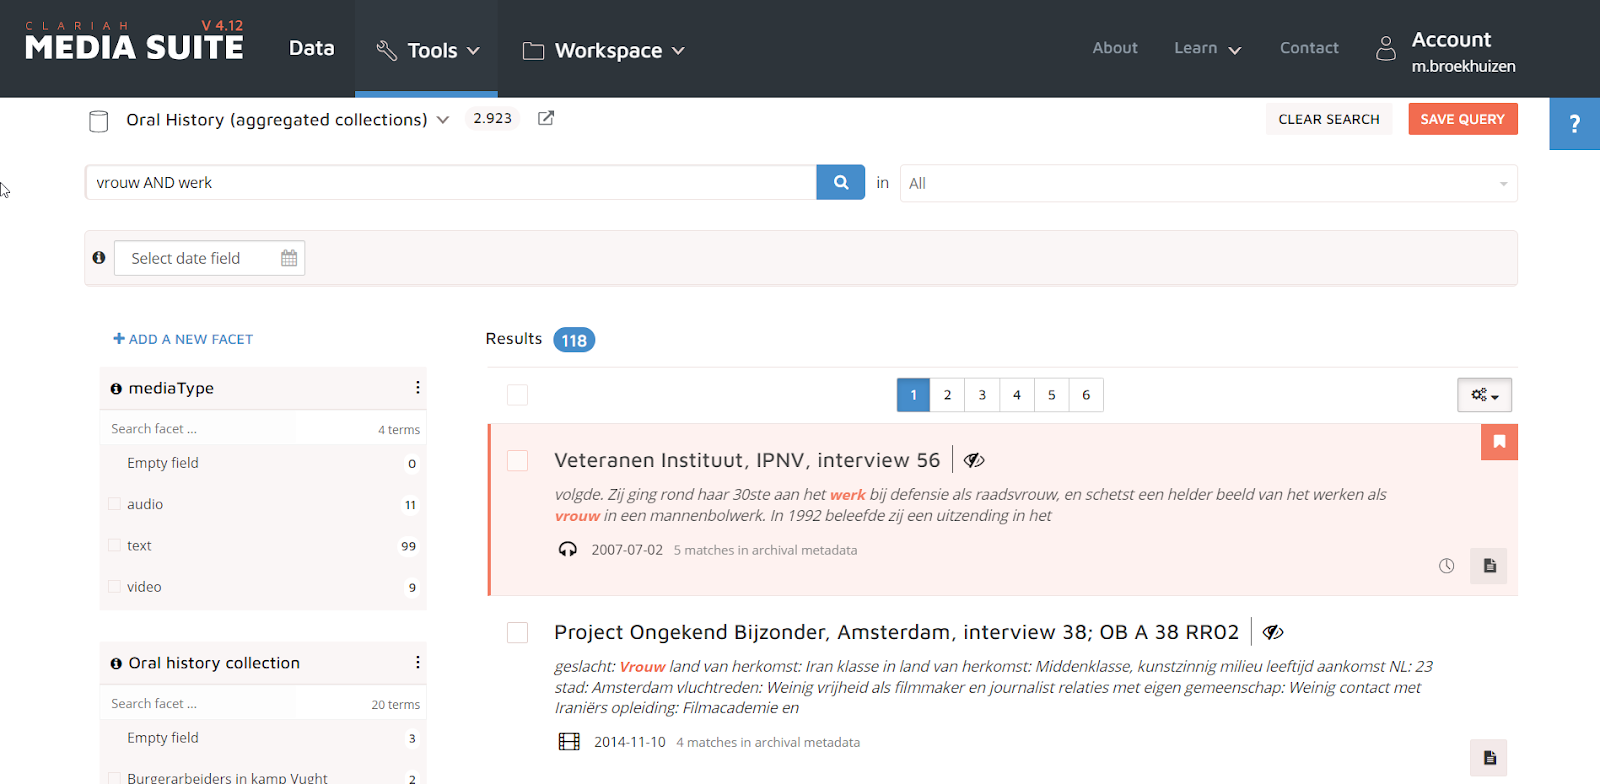
Search with a query that turned out to be successful in the last step. For the purpose of illustration, I will choose “vrouwen AND werk” .
-
Take a look at the left hand bar . Here you can see different facets that you may use narrow down your results further.
-
MediaType makes it possible to select only a specific medium of interview. If you are only interested in video, you can select video.
-
Collection makes it possible to search for terms within a specific Oral History collection. The Dutch Veteran (Nederlandse Veteranen IPNV) collection is an example of a large collection that you might want to focus on.
-
Access rights are useful if you are not planning on requesting permission for files that have limited access. In that case, you can filter for only files with Open access for registered DANS users, for example.
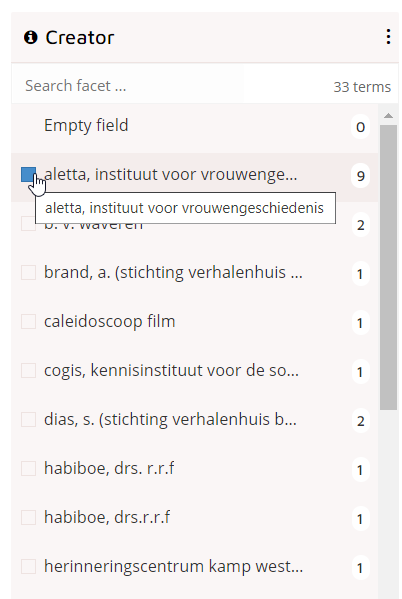
-
Creator will let you select a collection owner to focus on. In our example case, it could be useful to filter for only interviews that belong to Aletta (now Atria, institute for Women’s History).
-
Play around with the facets and think about ways to use these facets to filter your search results in relevant ways.
-
OPTIONAL: The facets that you see now are not the only ones. Add more facets by using the “+ add a new facet” at the top of the facet list.
4. Saving queries and opening saved queries
Finding and Bookmarking Oral History Interviews (Part 4 of 6) from Media Suite on Vimeo .
In the previous steps, you have explored which search queries have had fruitful results, and how you may filter these results using facets. For various reasons - for instance for reasons of transparency, being able to explain the steps of your research to others or to easily continue your research at a later stage- it may be useful to store the useful search queries. In this step, you will learn how this works in the Media Suite.
-
Enter a query that you would like to be able to use again at a later stage in your research.
-
Use facets to filter the query.
-
Click “Save Query” in the upper right corner to save your query parameters. Your query parameters do not only entail your search term, but also the facets you have selected.
-
Once you have clicked the “Save Query” button, the query will have been saved to your active user project
-
NB! Even with a saved query that you have used before, research results may not always be the same every time, for instance if new metadata or ASR data have been added to the environment since you last worked in it.
5. Bookmark Items
Finding and Bookmarking Oral History Interviews (Part 5 of 6) from Media Suite on Vimeo .
Not only are you able to store search queries in your user projects; you can also store specific items, in the case of oral history research primarily case interviews. By doing this, you will be creating a personal corpus of interviews.
-
Repeat some of your most fruitful searches.
-
Click on an interview that looks relevant for your research.
-
If you decide that this interview is relevant for your research, click the bookmark button in the upper right corner.
-
You will be presented with the following screen, on which you will have to create a bookmark group that fits your interview. Here, I chose “Workspace”, as the interview in question has to do with being the sole woman at a certain workspace.
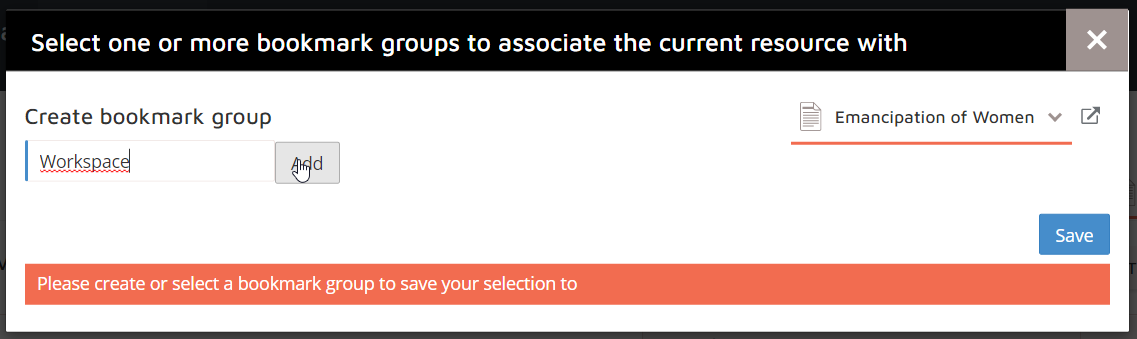
- Click save and go back to your search results using the “back to results” button in the top right corner. As you can see, the interview you bookmarked is highlighted in orange in the search results now.
- It is also possible to bookmark multiple search results at the same time. To do this, check the desired items in the search results and press the blue checkmark at the top of the list when you are done. In the small dropdown menu, click “bookmark selection”.
6. Exploring your corpus
Finding and Bookmarking Oral History Interviews (Part 6 of 6) from Media Suite on Vimeo .
Now that you have created a corpus through bookmarks, it is time to take a look at this corpus. In this step, you will familiarize yourself with your personal workspace within the Media Suite, as well as with ways in which you may gather context relating to the interviews in your corpus.
-
Hover over the “Workspace” tab
-
Click on “user projects”
-
Click the project you made for this tutorial.
-
Now you will see different tabs that are all part of your user project.
-
Details : information about your user project
-
Bookmarks : your corpus, all the interviews you have decided to bookmark in step 3
-
Queries : the search queries you saved in step 4
-
Annotations and Tool Sessions : these are irrelevant for this tutorial, consult other tutorials for more information.
-
Go to the bookmarks tab and look at the titles of the interviews. You will see that almost all interview titles consist of a collection name, a number, and sometimes further information such as location or the interviewee’s name.
-
What collection names stand out to you? In my bookmarks, the “Vrouwen van de CPN” (Women of the Dutch Communist Party) collection is particularly represented.
-
To learn more about a collection, click the “Data” button in the top bar.
-
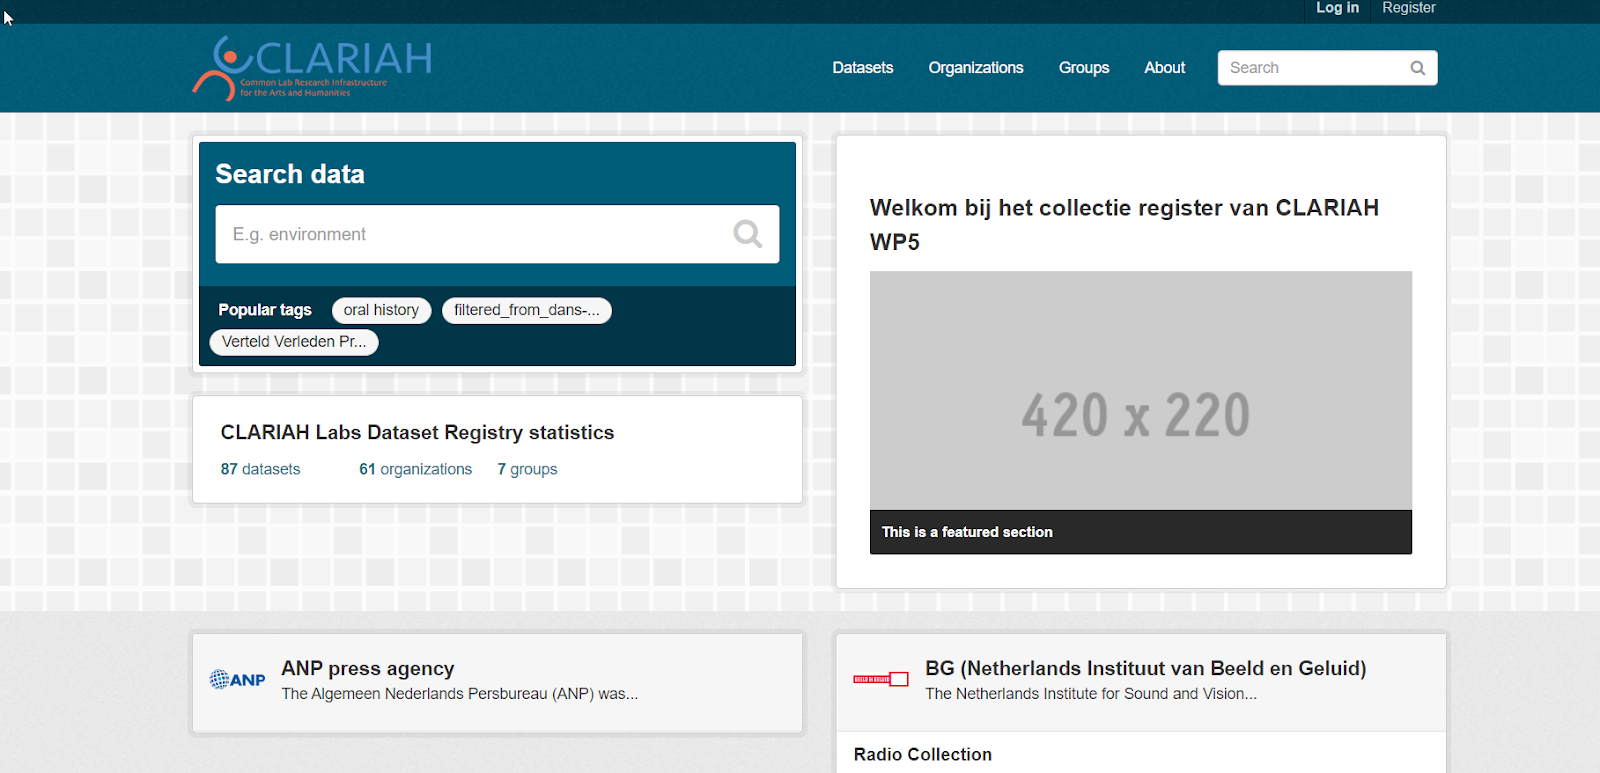
Click “available collections” to go to CKAN. CKAN is the CLARIAH-NL’s collection registry, and contains descriptions of every collection that is available in the Media Suite.
-
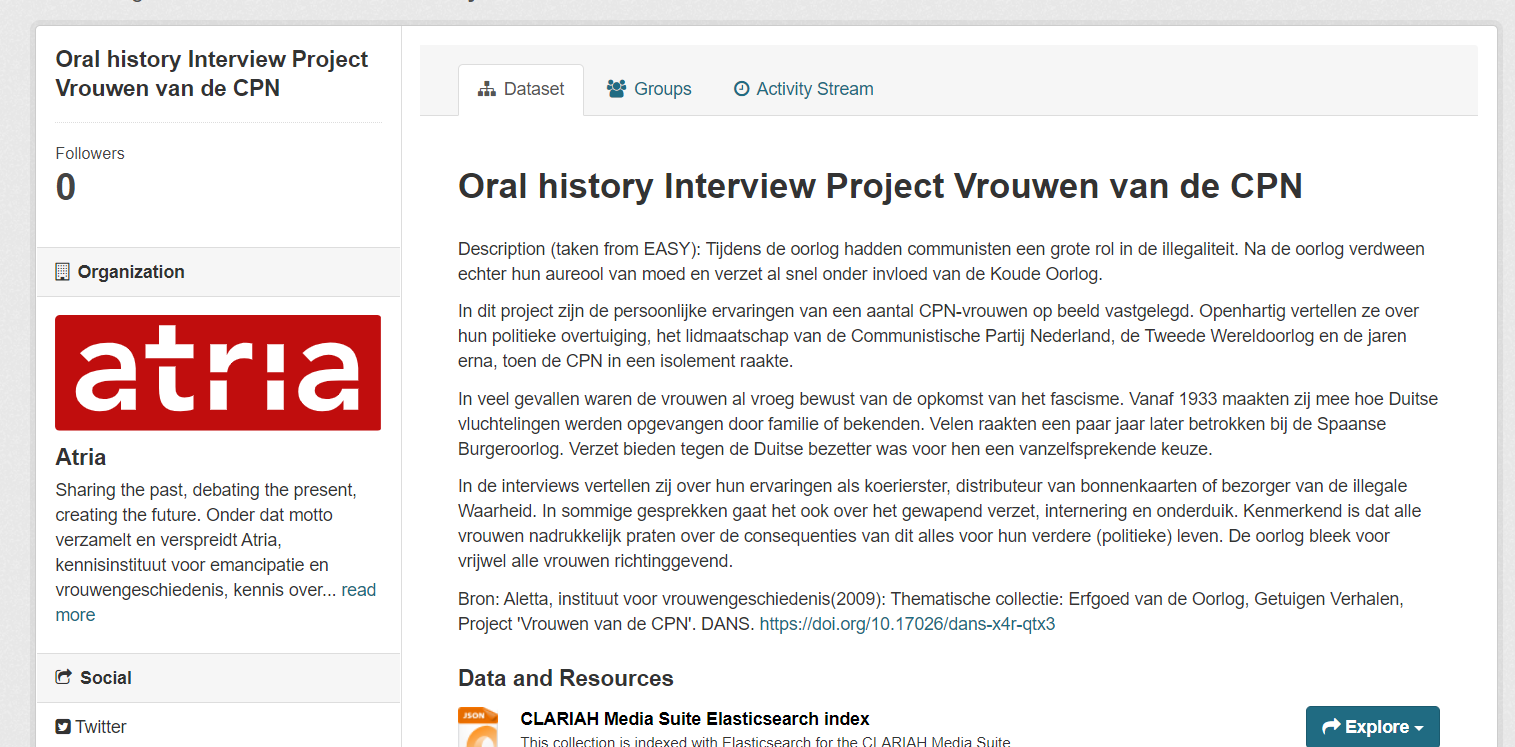
Search for a collection you want to know more about. I will look for “Vrouwen van de CPN”
-
Here, I learn some valuable information and context about the collection. I see that it was created by Aletta, the institute for Women’s History, which has since changed its name to Atria. I also learn the general interview subjects, the date of creation and something about the reason for creation.