Tutorial: Video Segmentation, Annotation and Structuralist Film Analysis
Tutorial for CLARIAH Media Suite V 5
Tutorial Description, Case and Objectives
In this tutorial you will learn how to carry out a structuralist film analysis in the Media Suite using the environment’s video segmentation functionalities, based on principles from film theorist Raymond Bellour’s approach to film segmentation. After completing the tutorial, you will know how to make an overall analysis of the structure of a film by splitting it up into sequences, understood as a series of scenes linked by their content. In addition, using the Media Suite’s segmentation and annotation functionalities, you will also have learned how to segment a sequence shot-by-shot. Moreover, you will know how to use the environment’s annotation functionalities to briefly summarize the content of each sequence, including a rationale of how you arrived at demarcating sequences. To sum up, you will be able to use the Media Suite for:
-
Building a corpus consisting of one or more films from the film collections available in the Media Suite, in particular Eye’s Jean Desmet Collection
-
Creating a segment and shot segmentation in the Media Suite using the environment’s segmentation and annotation functionalities
-
Annotating video items on segment and shot levels to add your own comments, including an underlying rationale for your segmentation
For the tutorial you will be working with D.W. Griffith’s The Lonedale Operator (1911). This film has a good length for an introductory structuralist film analysis exercise and is helpful in understanding basic principles of early continuity editing.
Types and levels of teaching and research
This tutorial is intended for film and media students at BA level that are familiarizing themselves with segmentation-based analysis of films. The tutorial may support both film historical teaching, in particular teaching on film editing’s development, as well as film analysis.
Prerequisites
It is a prerequisite for this tutorial that you are familiar with the basic principles of Raymond Bellour’s structuralist approach to film analysis, in particular as it is developed in his classic article “System of a Fragment (on The Birds )” (1969) on Alfred Hitchcock’s The Birds (1963). It may also be helpful to be familiar with the segmentation principles introduced in David Bordwell, Kristin Thompson and Jeff Smith’s Film Art (2017, eleventh edition).
Acknowledgements
This tutorial has benefitted from the input and course development of Utrecht University’s Film Studies team, in particular in relation to the BA course Introduction to Film Studies .
Steps
1. Accessing the Media Suite
-
Before you can begin segmeninig a film in the Media Suite you first need to log in to the environment. In order to do so, go to mediasuite.clariah.nl
-
Click on the “Log in” button (top right of the page)
-
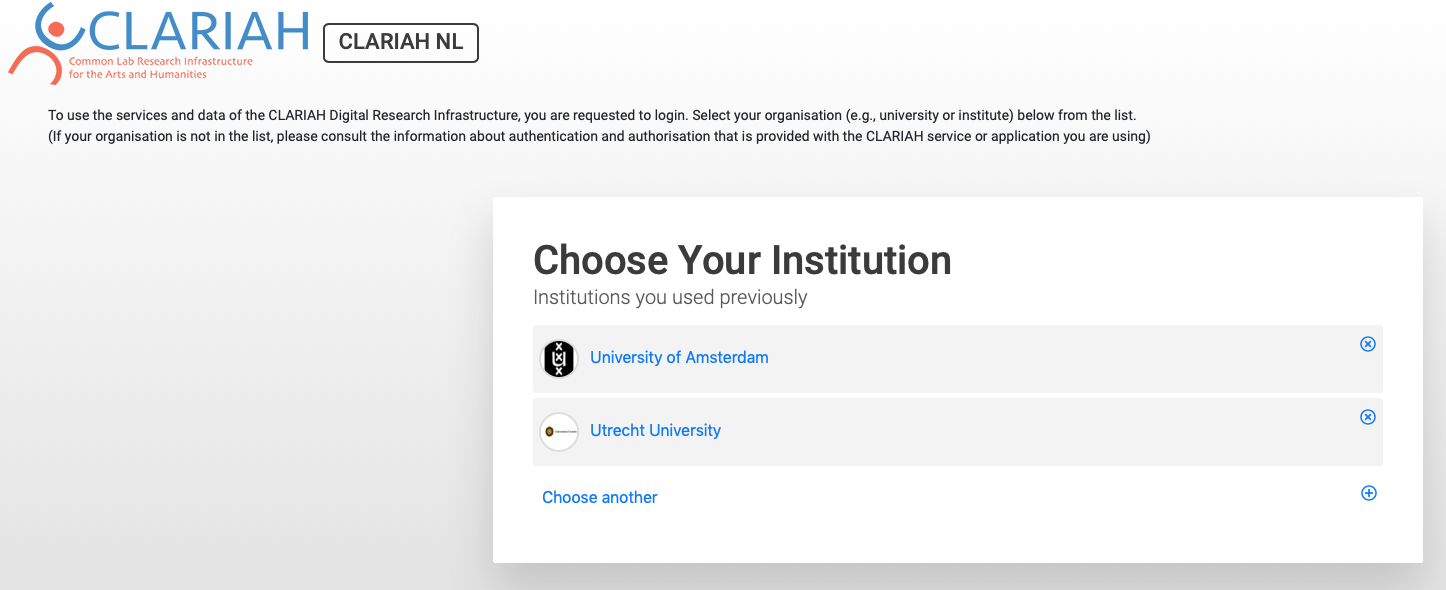
In the SURFConext interface, search for the name of your institution, or scroll through the list
-
Select your institution
-
Use your institutional credentials to log in, wait until the service connects ( NB if logging in the first time, you will have to accept Terms of Use and Privacy)
-
You will now enter the Media Suite workspace
2. Create a User Project
-
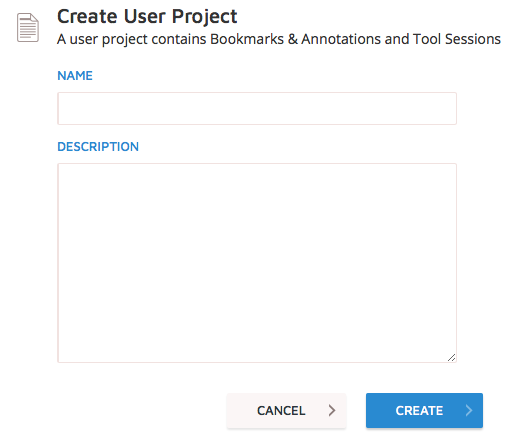
After having logged in, you need to create a user project. In order to so, hover over the “Workspace” tab. From the drop-down menu, choose “Create User Project”
-
Name your project and add a project description. As you will be working with *The Lonedale Operator (1915) *in this tutorial, you may for instance call the project “Lonedale Operator Segmentation” and add a description that describes your project’s aims, namely segmenting the film.
-
Click the “Create” button to confirm
3. Find, select and bookmark a film with Search tool Desmet Film Collection
-
Now you have to find the film you want to work with, in this case The Lonedale Operator
-
Hover over “Tools” tab and select “Search” from the drop-down menu
-
Set active project in upper left corner and choose the project you just created for your analysis of The Lonedale Operator
-
Subsequently, you need to add the film item to the corpus of your user project. To do so, click “Select Collection” in the upper left corner
-
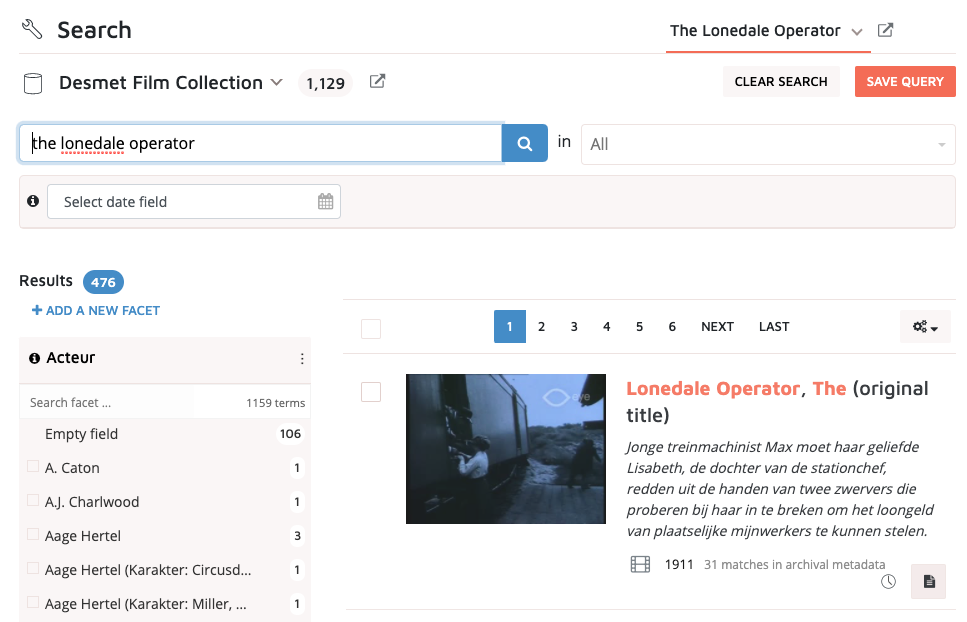
Then select “Desmet Film Collection” from the drop-down menu (see image above for an illustration of how this should look like)
-
Once you have selected the collection and can search in it, search for “Lonedale Operator”. This should make the film appear in the results overview (it is usually the first search result). Click on the film to enter the video player
-
Next, you need to bookmark the item in the viewer. By bookmarking the item, you enter it into your user project’s corpus. In order to bookmark the item click “Bookmark resource” in the upper right part of the screen above the video player. The bookmark window opens.
-
In the bookmark window, add the film to a bookmark group. If needed create a bookmark group, for instance “Film” or “The Lonedale Operator”, since in this case you are adding a specific film title to your corpus
4. Creating a segment
-
After bookmarking the film, you can begin segmenting it into sequences according to the principles of Bellour’s structuralist film analysis
-
The principles of film segmentation are by no means set in stone. Ultimately, it is up to you, the analyst, to think carefully about unifying aspects as a basis for demarcating sequences yourself, to substantiate your choices and to reflect on possible alternatives
-
In creating a segment that you identify as a sequence, you may attend to the following elements: Shot length in seconds, transitions between shots (other than hard cuts), framing/camera position, camera movement, sound/music, dialogue, and narrative content/action in shots, or notable aspects of the mise-en-scène (use of specific colours, lighting, etc.)
-
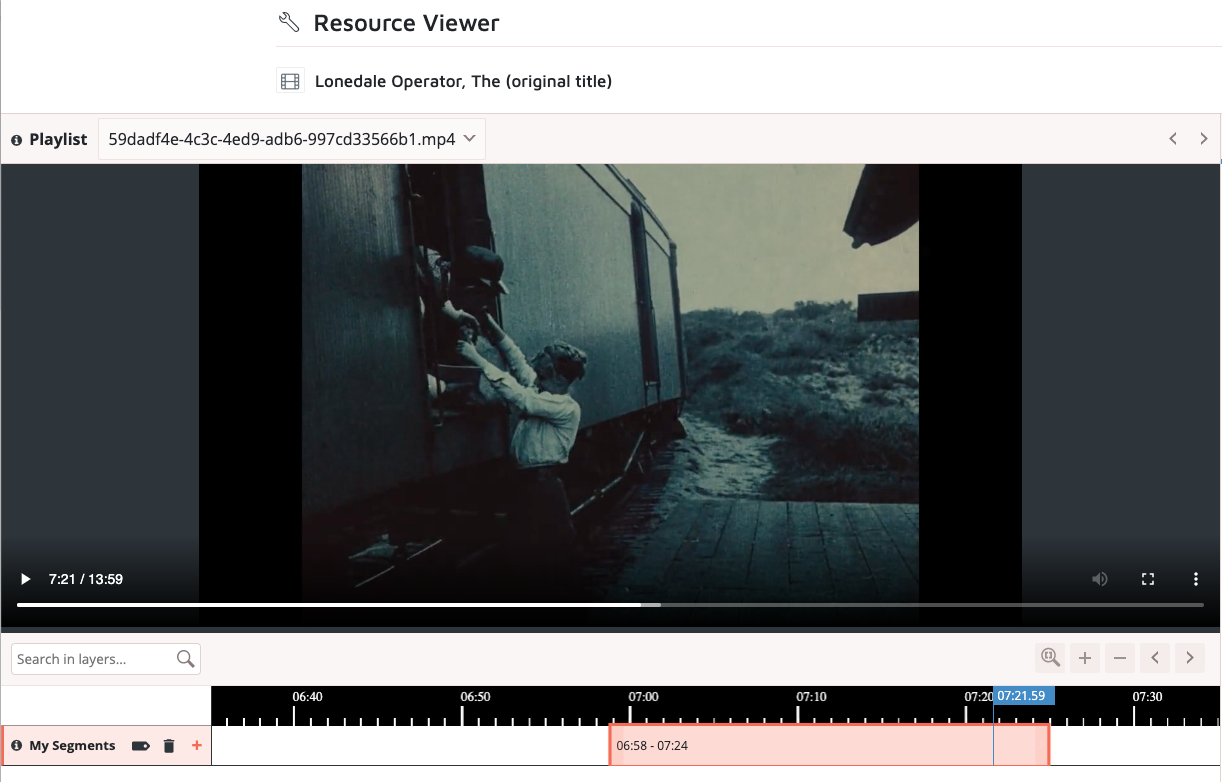
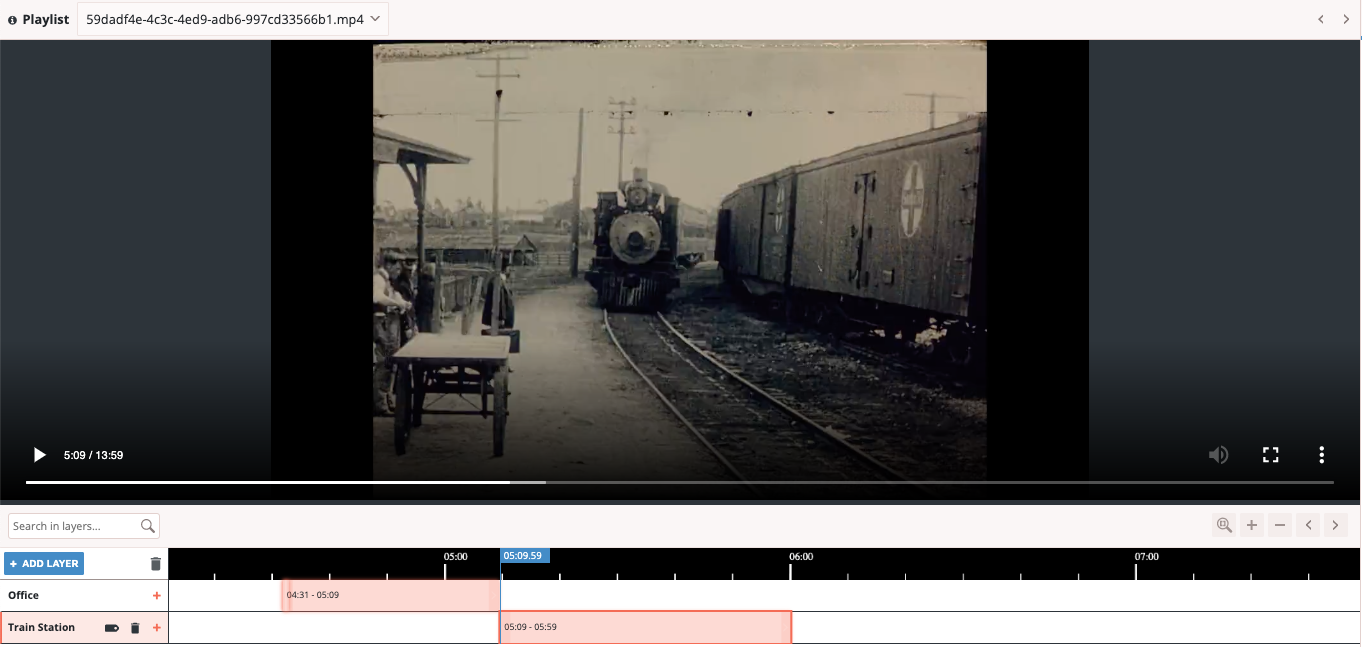
After having chosen a sequence, you can create a first segment. To create a segment pause the video where you want to begin the segment. After having chosen a meaningful beginning point click the “+” button in the “My Segments” bar on the left hand side below the video player. A red box appears at the point chosen.
-
Subsequently, you need to choose an endpoint for your segment. To do so, pull the end point of the box that appeared after completing the previous step and set it to where you wish to end the segment/sequence (see the image above for an example).
-
In order to make a new segment/sequence, simply press “+” again in the “My Segments” bar below the video player.
-
If you subsequently wish to modify the beginning and end points of your segments, click on the segment you wish to change to make it active and then drag the beginning and end points to where you want to set them.
5. Shot segmentation
-
Currently it is not possible to break down a segment into smaller analytical units. This means, that if you want to make a shot segmentation of a sequence in the Media Suite, you have two options.
-
The first option is to create a shot segmentation on top of an existing segment. You do this by creating a segment of each shot on top of a sequence segment (see the image above for an example). Visually, this is not the most practical way to proceed as it creates a cluttered timeline, as you currently only have one timeline to work with (**NB **in the upcoming version of the Media Suite, this will change with the introduction of multiple timelines, making it possible to work with different layers of segmentation, for instance on sequence and shot level respectively).
-
The second option is to include a shot outline of a sequence in a written annotation on sequence level. In order to learn how to do this, go to the next step.
6. Annotating film on segment level I - Sequence
-
In a structuralist film analysis you need to describe the internal mechanisms of the sequence and explain its significance in the film as a whole, using Bellour’s and/or Thompson & Bordwell principles. When doing this, you may think in terms of patterns (repetitions, mirror effects, breaks in series, etc.) that you see in the framing and montage, image/sound coherence, mise-en-scène and so on. A shot outline may be part of such an explanation.
-
In the Media Suite, you can annotate items on item level and on segment level. By annotating on item level you add an annotation relating to the whole item. By annotating on segment level you add an annotation to a specific selection of that item.
-
In this step you will be annotating on segment level
-
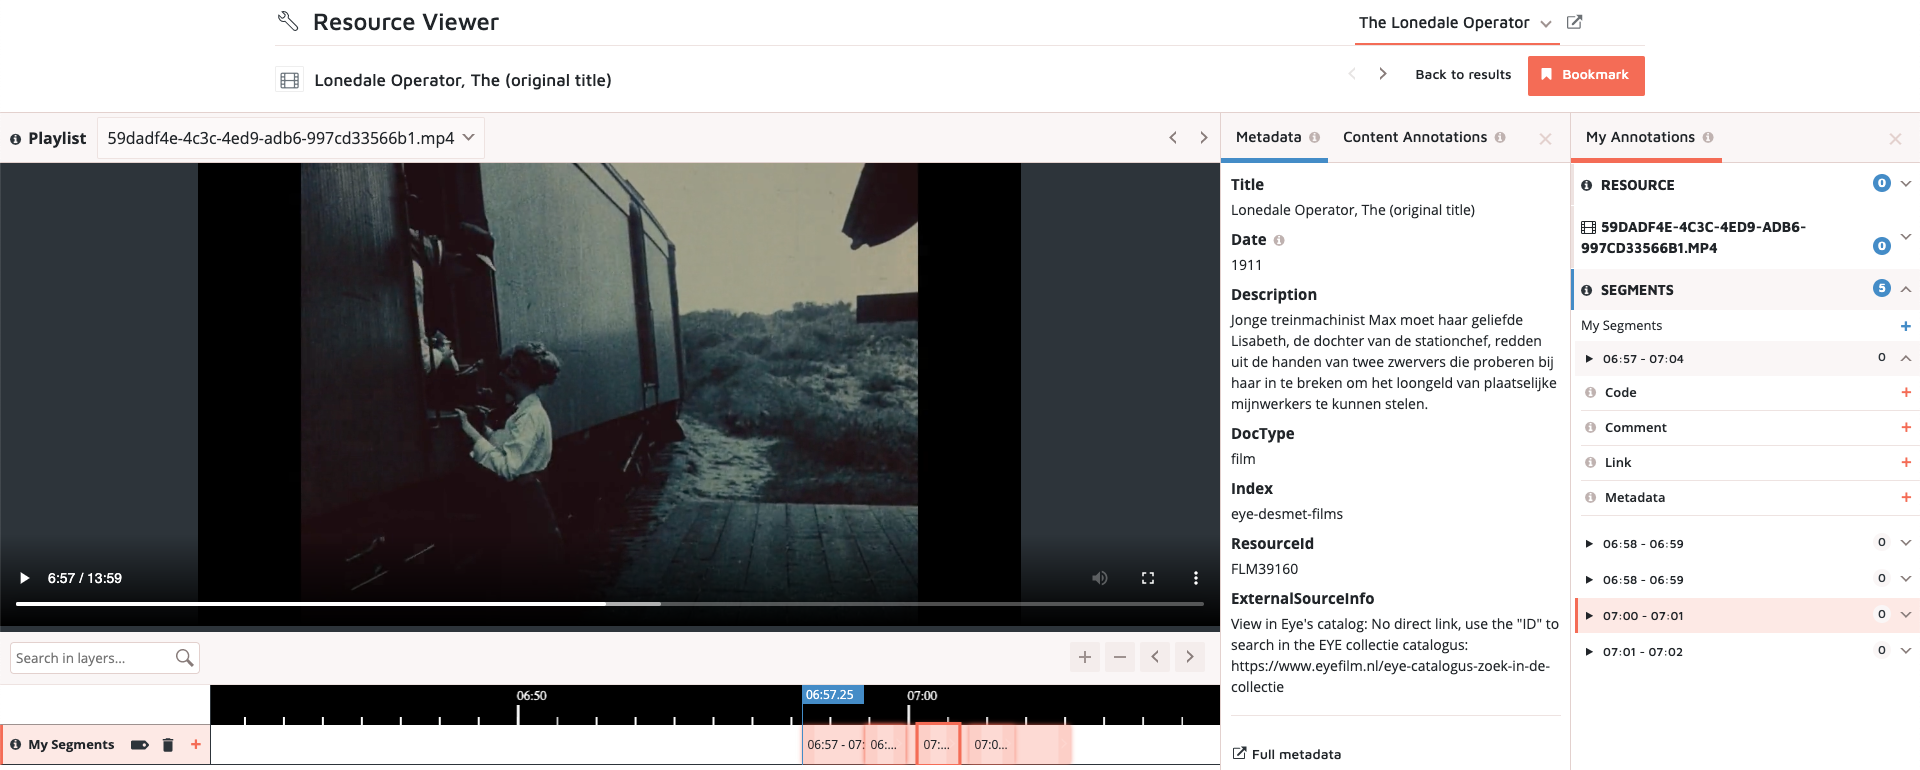
In order to annotate on segment level, go to “My Annotations” part on the right-hand side of the screen and click on “SEGMENTS”.
-
Clicking on “SEGMENTS” opens a drop-down menu with four options: “Code”, “Comment”, “Link” and “Metadata” (see the image above for an example):
-
“Code” allows you to label the film/media item using terms from existing thesauri (such as GTAA and UNESCO) or using your own custom-made taxonomy
-
“Comment” gives you the possibility to enter your own comments about the item without a set word limit
-
“Link” allows you to include links to items in the Media Suite or outside of it
-
“Metadata” allows you to devise your own metadata scheme for the item.
-
-
For the purpose of a structuralist film analysis, we recommend using the “Code” and “Comment” annotation functionalities as they allow you to label your segments and comment freely on them
-
The segments you created as part of steps 4 and 5 will appear in an overview at the bottom of the “SEGMENTS” section once you click on that section
-
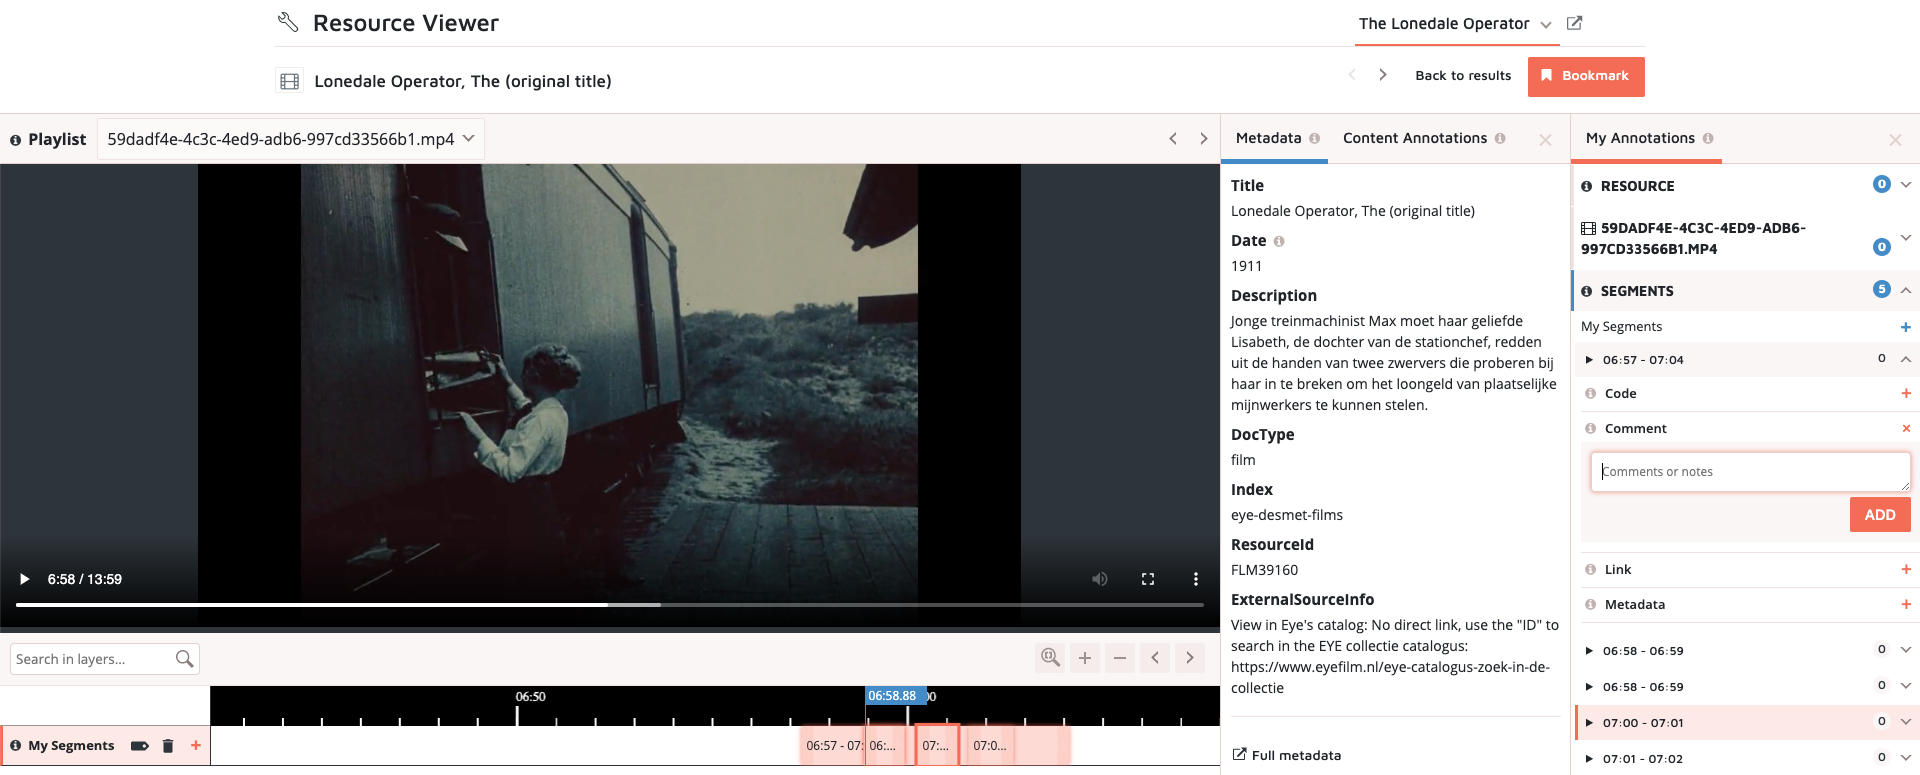
In order to add a comment to a segment you need to choose a segment by clicking on it in the overview appearing at the bottom of the “SEGMENTS” section
-
Upon clicking, a drop-down menu will appear with the same four options that was offered for annotating on item level (“Code”, “Comment”, “Link” and “Metadata”)
-
Clicking on “Code”, you may add a label to your sequence using a custom vocabulary. In order to do so, click on “Code” and then choose “Custom (no external lookup)” from the dropdown menu that appears. As an example you could add the code/label “Continuity Editing 1” if you wish to highlight that the chosen sequence is primarily characterised as a first interesting instance of continuity editing within The Lonedale Operator
-
Clicking on “Comment”, you may add a comment to the chosen sequence in which you explain the rationale behind your demarcation in greater detail. This may entail a shot outline - as suggested in the previous step - a content description or an analytical point with regard to the narrative structure of the sequence and the role of the sequence within the film’s overall system
-
You may do this for each segment created, until you feel you have exhausted your analysis of the material
7. Annotating film on segment level II - Shot
-
If you have chosen to create separate segments per shot instead of fx including a shot outline in a comment, you have the same annotation options as in the step above.
-
Following the same steps as outlined under step 6, you may use the “Code” annotation option to for instance categorise shots into shot types (close-up, medium, long, etc.) or to label its location or stylistic effect
-
Likewise, you may use the “Comment” function to add more expansive notes on the composition or contents of a shot
-
Again, you may do this for each shot segment until you feel you have added all necessary information and analytical points
-
Well done, you now know how to segment and analyze the structure of a film in the Media Suite!