Media Suite Tutorial: Creating an Annotated Corpus of Historical Television Documentaries and Newspaper Articles
Tutorial by Norah Karrouche (VU) for CLARIAH Media Suite V 6.4, August 2022
Tutorial Description, Case and Objectives
In this tutorial, you will learn how to compile and annotate a corpus of historical television documentaries and newspaper articles . For this purpose, you will be using the Media Suite’s Search Tool and Bookmarking and Annotation functionalities. Upon completing this tutorial, you will know how to:
-
search for archival sources in the Media Suite
-
how to bookmark relevant sources into a personal user project
-
annotate a corpus of bookmarked archival items
Before beginning this tutorial, it is a prerequisite that you know how to log in to and create a user project in the Media Suite. If you are not yet familiar with these aspects of using the Media Suite, please consult the tutorial “Logging In, Workspace and Creating a User Project” .
This tutorial revolves around the documentary and curatorial work of Dutch architect Herman Haan (1914 1996). Historians have generally approached Haan as an architect who contributed to the development of Dutch structuralism after the Second World War. This architectural theory foregrounded man’s emotional needs and relationship with his environment, and can be seen as a reaction against the functionalist approach of the influential Congrès International d’Architecture Moderne (CIAM). In 1959, out of this organization an informal network of like minded architects emerged, Team X. In the architectural journal Forum, Haan along with Dutch Team X members Jaap Bakema and Aldo van Eyck, developed ideas on structuralism, emphasizing the universal nature of man, and the need for architects to design spaces where man could at once be more in touch with his environment, and regain repose. Proponents of structuralism were drawn to ‘primitive’ societies, where they saw evidence of man’s natural inclination to establish meaningful connections with his environment. Haan was a prolific traveler, and as an amateur archaeologist and ethnologist, he visited North and West Africa numerous times. In 1929, at the age of fifteen, Haan traveled to North Africa for the very first time. He spent a couple of months in Morocco among a community of Berbers (Imazighen) in the Sahara. Many travels and expeditions in Morocco, Algeria, Tunisia and Mali would follow, as he became more interested in archaeology and anthropology, and collected items and made audiovisual recordings. As a result, Haan was regarded as an expert on North and West African (material) culture. This can be observed in publications for the journal Forum and documentaries for Dutch public broadcaster NCRV (Nederlandse Christelijke Radio Vereniging). In 1953, Haan donated a part of his collection to the Museum voor Land- en Volkenkunde in Rotterdam, where he then became honorary curator. Less is known about how his experience in North and West Africa contributed to the development of curatorial practice in ethnographic museums. Traces of Haan’s work are nowadays scattered throughout several museum and archival collections in the Netherlands. In this regard, the availability of television documentaries, their raw archival materials and newspaper collections featuring Herman Haan in the Media Suite offers an opportunity to see his work in a different perspective.
Tutorial Prerequisites
If you are not yet familiar with working in the Media Suite, it is recommended to follow this tutorial verbatim. If, however, you feel comfortable experimenting it is highly encouraged to do so, as this may be the best way to get a sense of how the search tool, bookmarking and annotation work and how to get relevant results that best meet your needs.
Types of Teaching and Research
The functionalities discussed in this tutorial are essential for using the Media Suite in any type of course work or research on all levels. This tutorial specifically shows how these functionalities may be used in historical research, and highlights techniques that work specifically well for this type of heuristics and annotation.
Acknowledgments
Supervision, editing and additional text: Christian Olesen (UvA).
Steps
Before taking the steps described below, make sure that you have logged into the Media Suite and created a user project. You may name your user project in whichever way you like. In this tutorial, the example user project will be named “Herman Haan”.
1. Search tool and collections
-
You first need to select a collection. In order to do so, hover over the “Tools” tab and select “Search” from the drop-down menu.
-
Set the active project in the upper right corner and choose the user project you wish to add items to. Please consult the tutorial “Logging In, Workspace and Creating a User Project” if you don’t know how to create a user project.
-
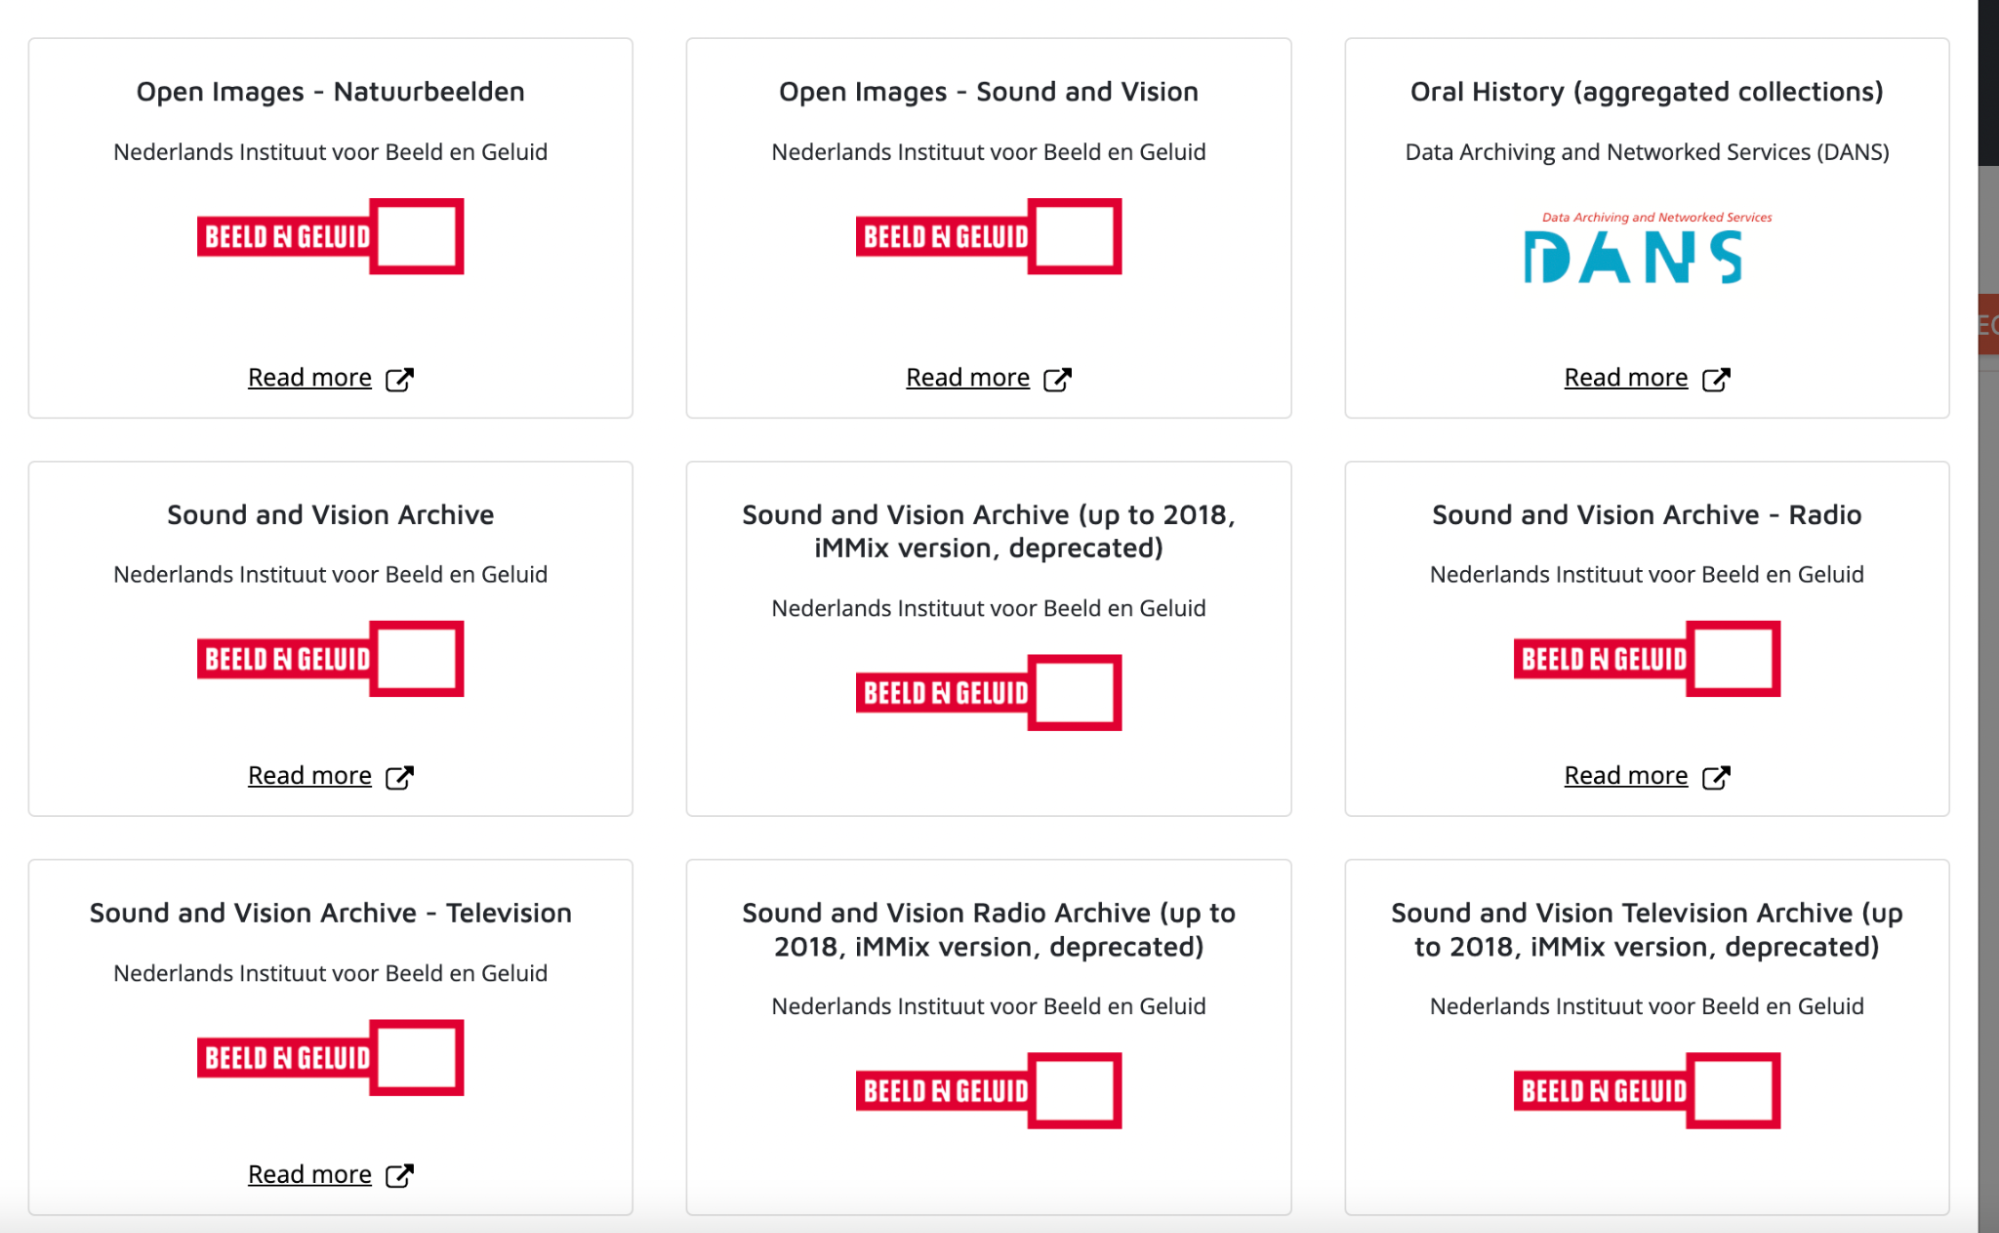
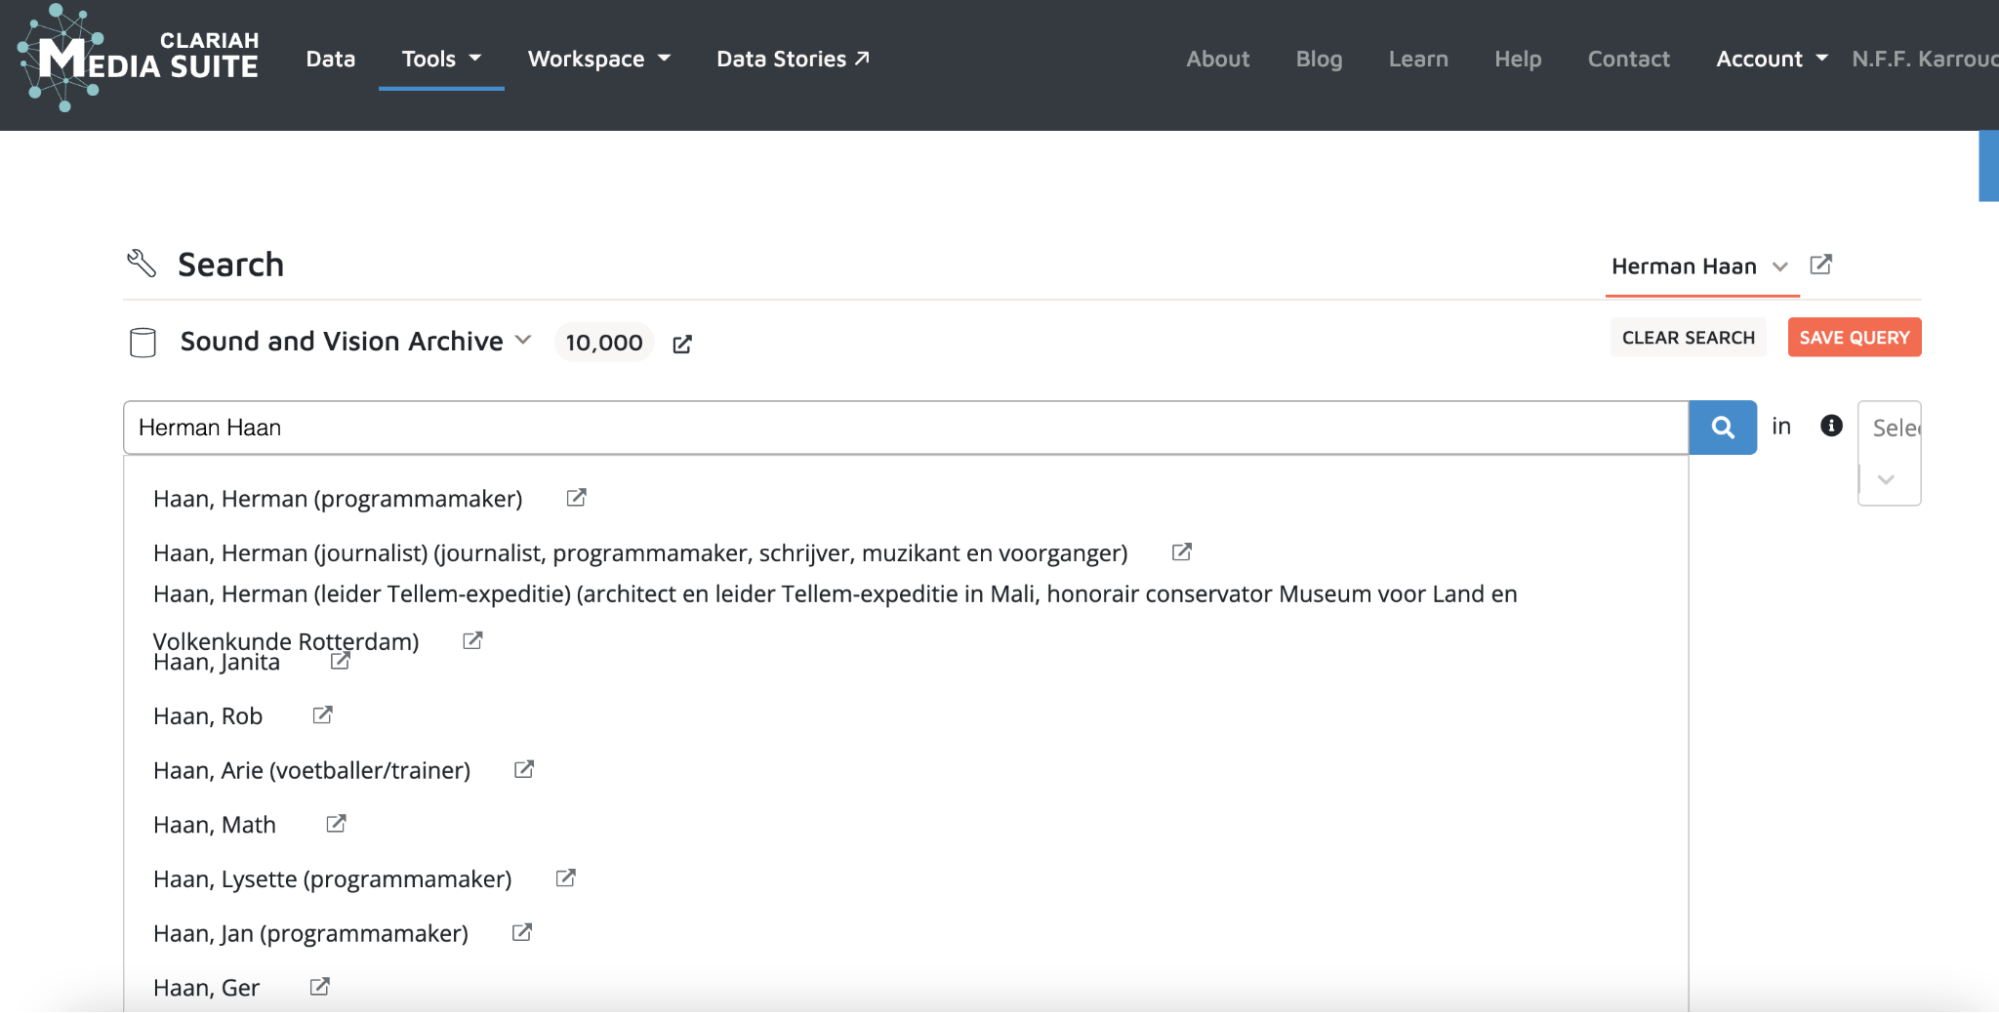
Then, Click “Select Collection” in the upper left corner. A drop-down menu now appears. Select the “Sound and Vision Archive” . You are now ready to start querying.
2. Finding Items in the Sound and Vision collection
-
To start your search, come up with several search terms and queries that could work well for this topic. To get started, you may try the following:
- Herman Haan
- Museum voor Land- en Volkenkunde Rotterdam
- Expeditie Tellem
- … but feel free to use your own search terms as you please.
-
Note how, when entering the above search terms, a drop-down menu with search suggestions appears. The person names in this list are derived from the GTAA , the Gemeenschappelijke Thesaurus Audiovisuele Archieven (Common Thesaurus for Audiovisual Archives), which is used to effectively characterize the content of audiovisual material from the Sound and Vision archive, with the help of a structured and controlled list of terms of reference, a thesaurus. You can find architect Herman Haan among the suggestions. Take into consideration that the result list generated by clicking on this suggestion is limited, as the results only cover collection items related to Haan’s Tellem expedition, while Haan conducted many other expeditions into North Africa, Mali and Niger.
-
Now try the above phrases both with and without “quotation marks” in order to refine results. Take note of the difference this makes in terms of the search results you get.
-
You may want to search in different “data layers”, for instance specific parts of archival metadata, such as keywords or full descriptions, or Automatic Speech Recognition (ASR) results. ASR is a technique used to identify and transcribe human speech into text. In the Media Suite environment you can opt to query the automatically recognised or transcribed spoken words of radio and television programs. This may yield other results. For more on querying ASR results in the Media Suite, please consult the “Searching and Analysing Automatic Speech Recognition (ASR) transcripts as Data Layer in Television Collections” tutorial.
-
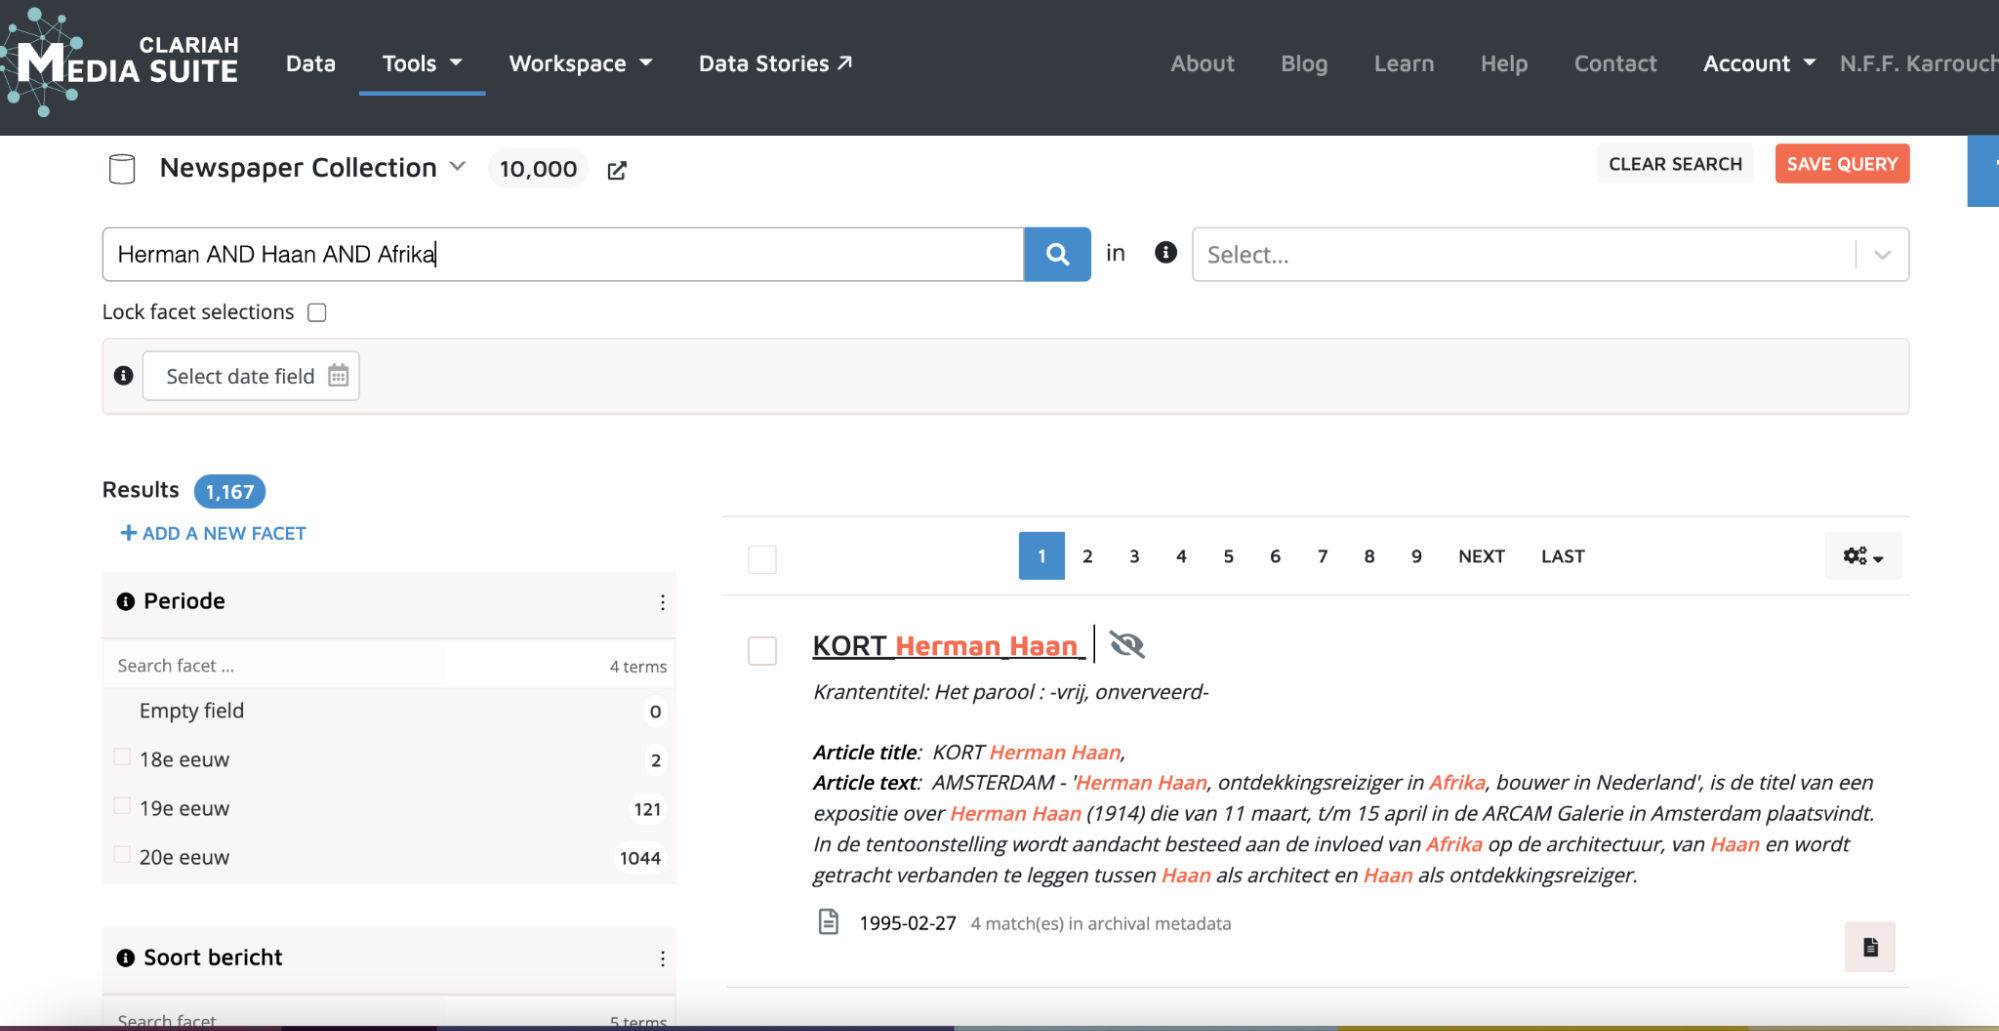
Search using other boolean query operators to combine different terms. Boolean query operators can combine search terms to make your queries more specific. An example is quotation marks, but there are more. You may try the following:
-
Herman AND Haan
-
Herman AND Haan NOT architect*
-
Herman AND Haan AND Mali
-
Herman AND Haan AND Algeria
-
Expeditie* AND Tunisia AND Haan
-
… but feel free to use different operators as you please.
-
-
Now compare results of searching with and without boolean operators , and notice the difference in both the amount of results and the results themselves.
- Take note of search queries with satisfying results. These will be used in the next steps.
3. Search queries and facets
-
You can now start to select facets to narrow down your search results even further.
-
Search with a query that turned out to be successful in the last step. For the purpose of illustration, I will choose “Herman AND Haan”.
-
Take a look at the left hand bar . Here you can see different facets that you may use to narrow down your results further.
-
MediaType makes it possible to select only a specific medium of interview. If you are only interested in video, you can select video.
-
Broadcaster makes it possible to search for terms within a specific broadcaster’s collection.
-
Genre may be useful if you want to eliminate specific types of formats.
-
Keywords may help you to select sources to focus on. They are particularly useful in an exploratory stage.
-
-
Play around with the facets and think about ways to use these facets to filter your search results in relevant ways.
-
The facets that you see now are not the only ones. Add more facets by using the “+ add a new facet” at the top of the facet list.
4. Saving queries and opening saved queries

-
Enter one of the queries used in the previous step that you would like to be able to reuse at a later stage in your research and use facets to filter the query if needed.
-
Now click the “Save Query” button in the upper right corner to save the query parameters to your user project. These will not only relate to the actual search terms used, but also to the facets you have selected.
-
Please take note of the fact that even with a saved query, research results may differ each time the query is reused, for instance in those cases where new metadata or ASR results have been added to the environment since you last worked in it.
-
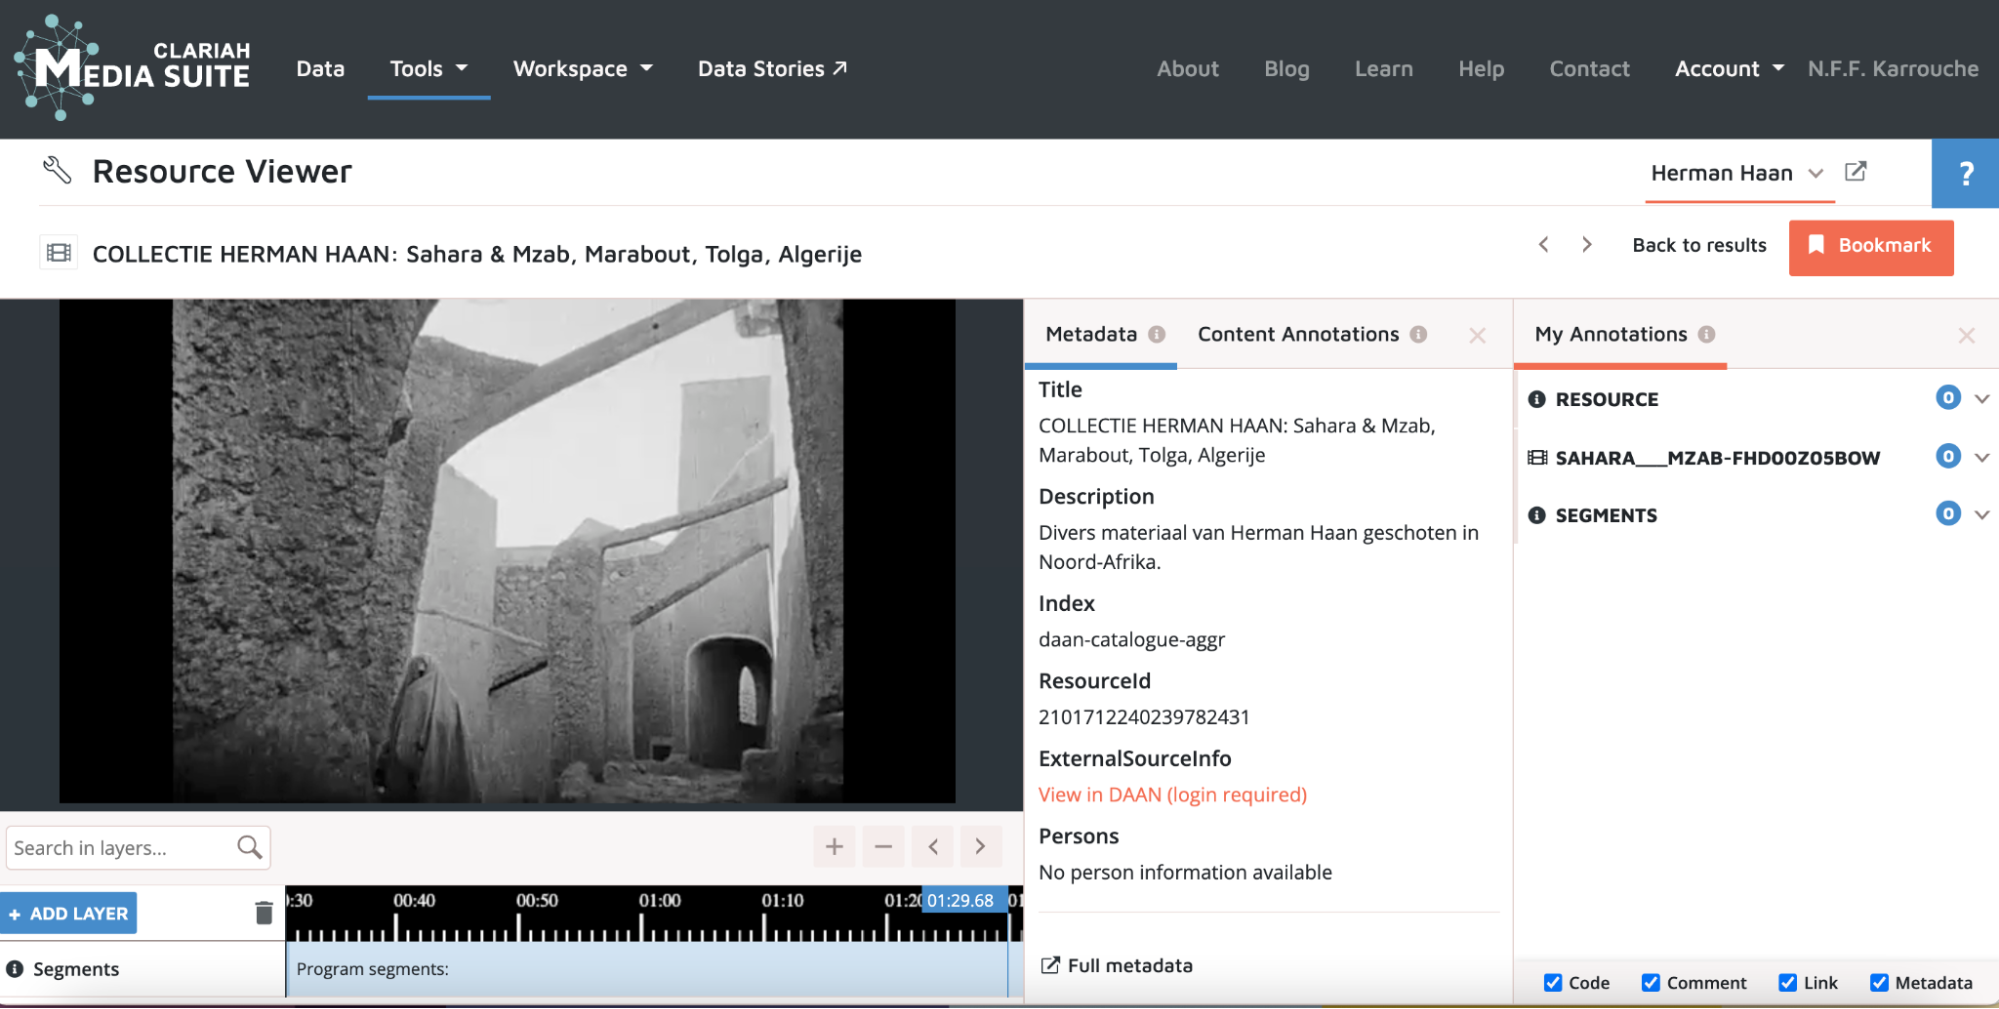
5. Bookmark Items Besides specific queries, you will need to save collection items to your user project in order to compile and annotate a corpus of historical television documentaries. Click on an archival item that looks relevant for the research.
-
If you decide that this item is relevant for the research, click the bookmark button in the upper right corner.
-
You will be presented with the following screen, on which you will have to create a bookmark group that fits your item. Here, I chose “Ruw materiaal” (or “Rushes”), as the specific item in question consists of a compilation of recordings that may have been used in one of Haan’s television documentaries. Click add.
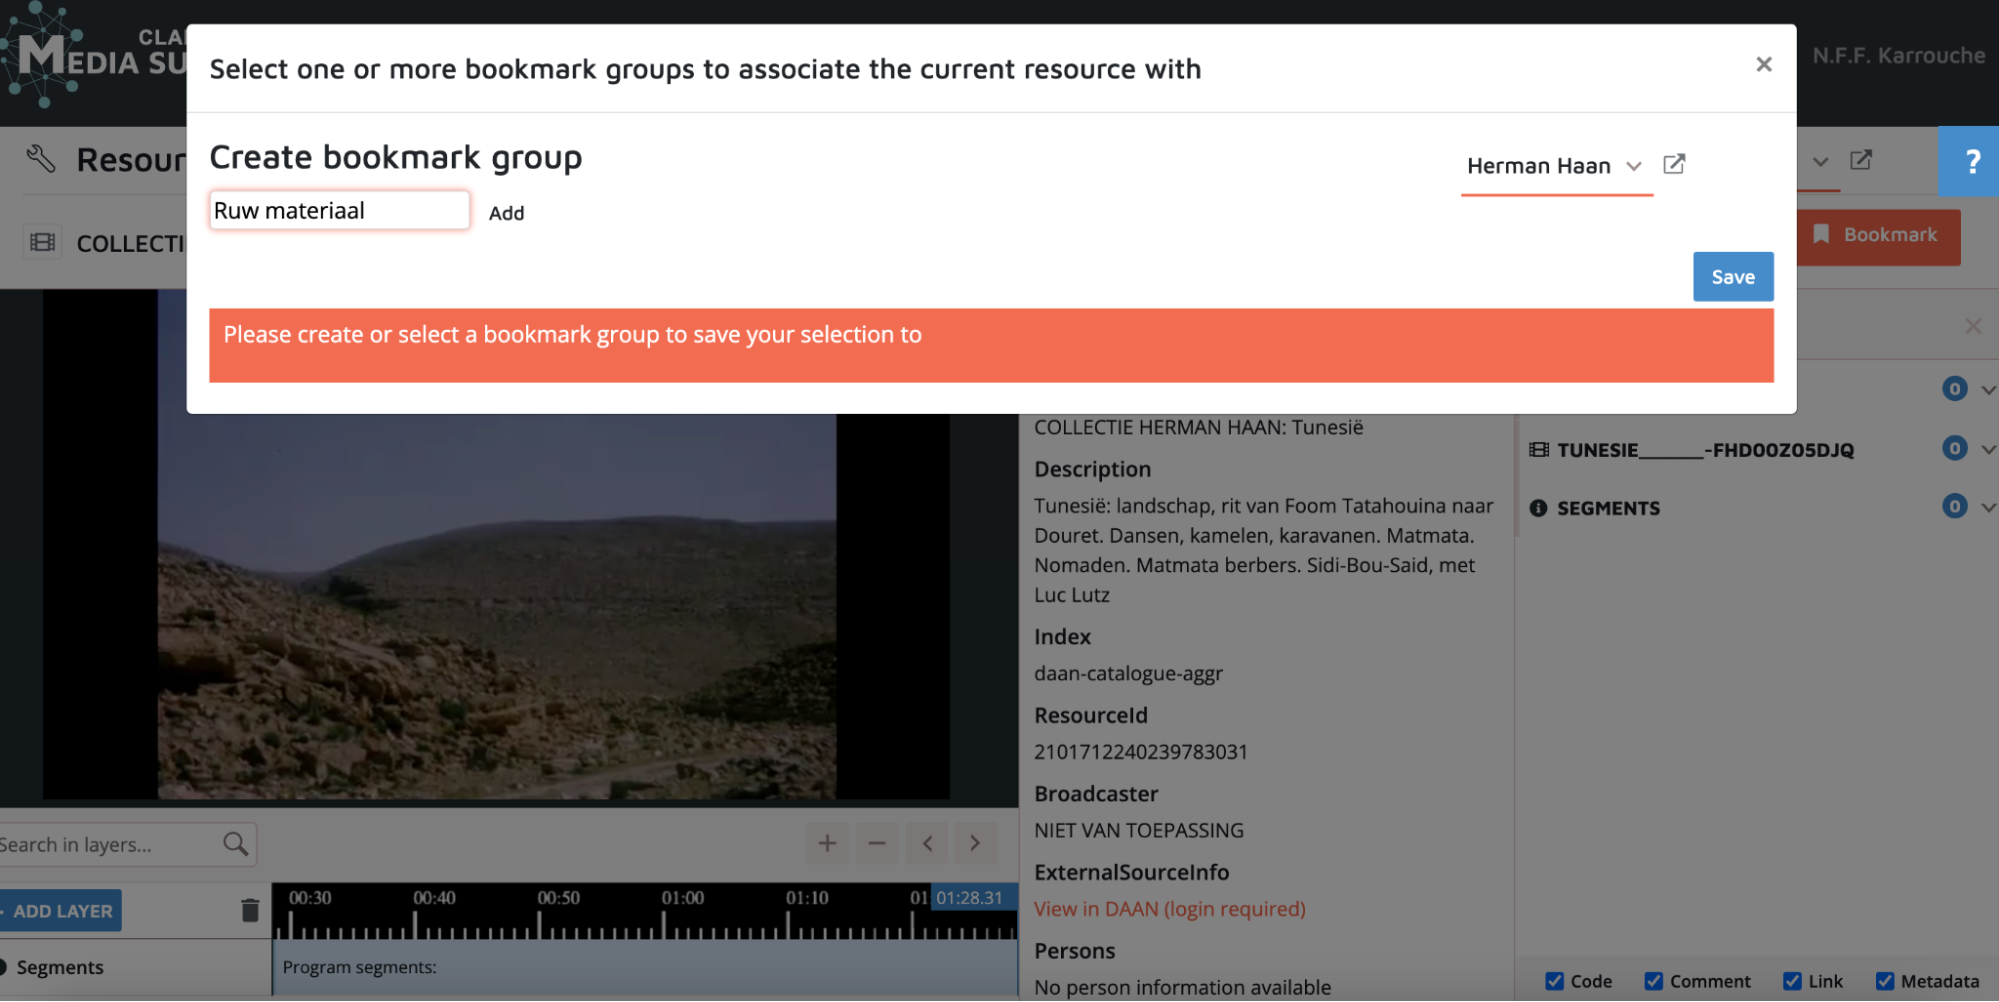
- The bookmark group has now been created.
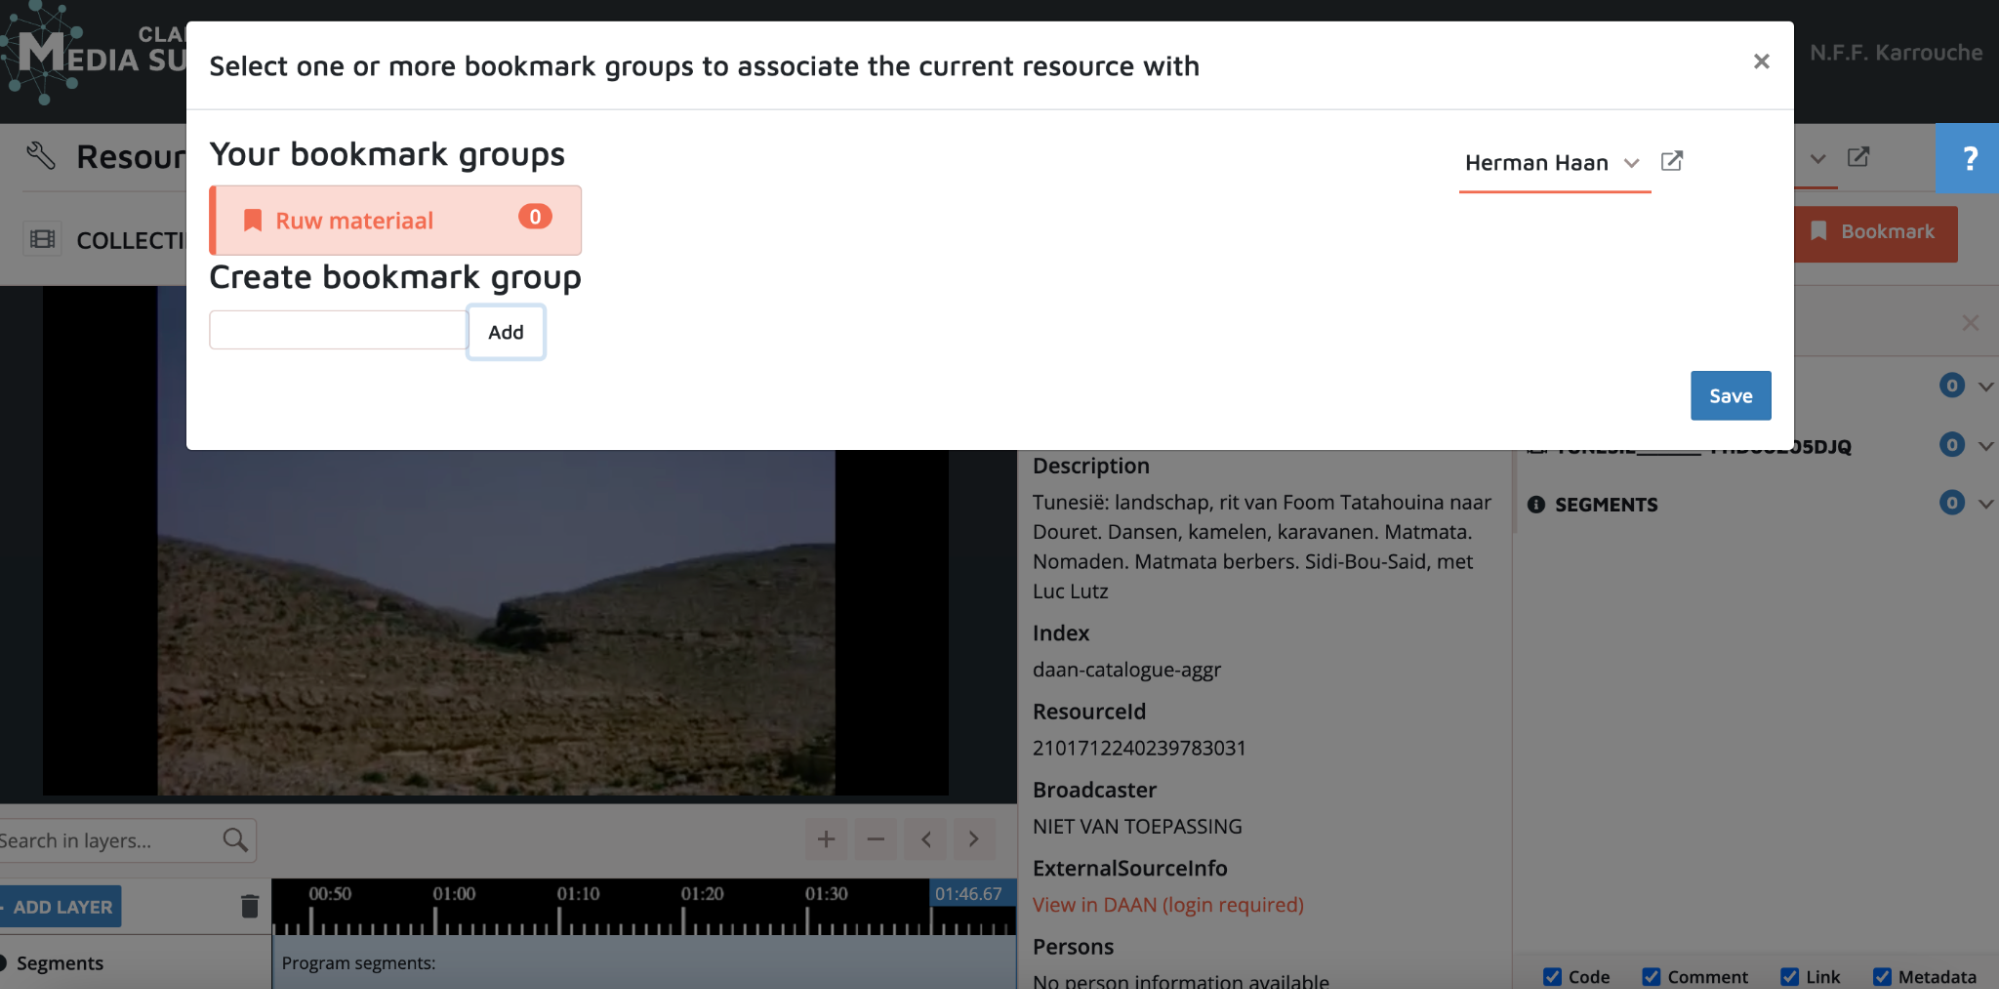
- Click save and go back to your search results using the “back to results” button in the top right corner. As you can see, the item you bookmarked is highlighted in orange in the search results now.
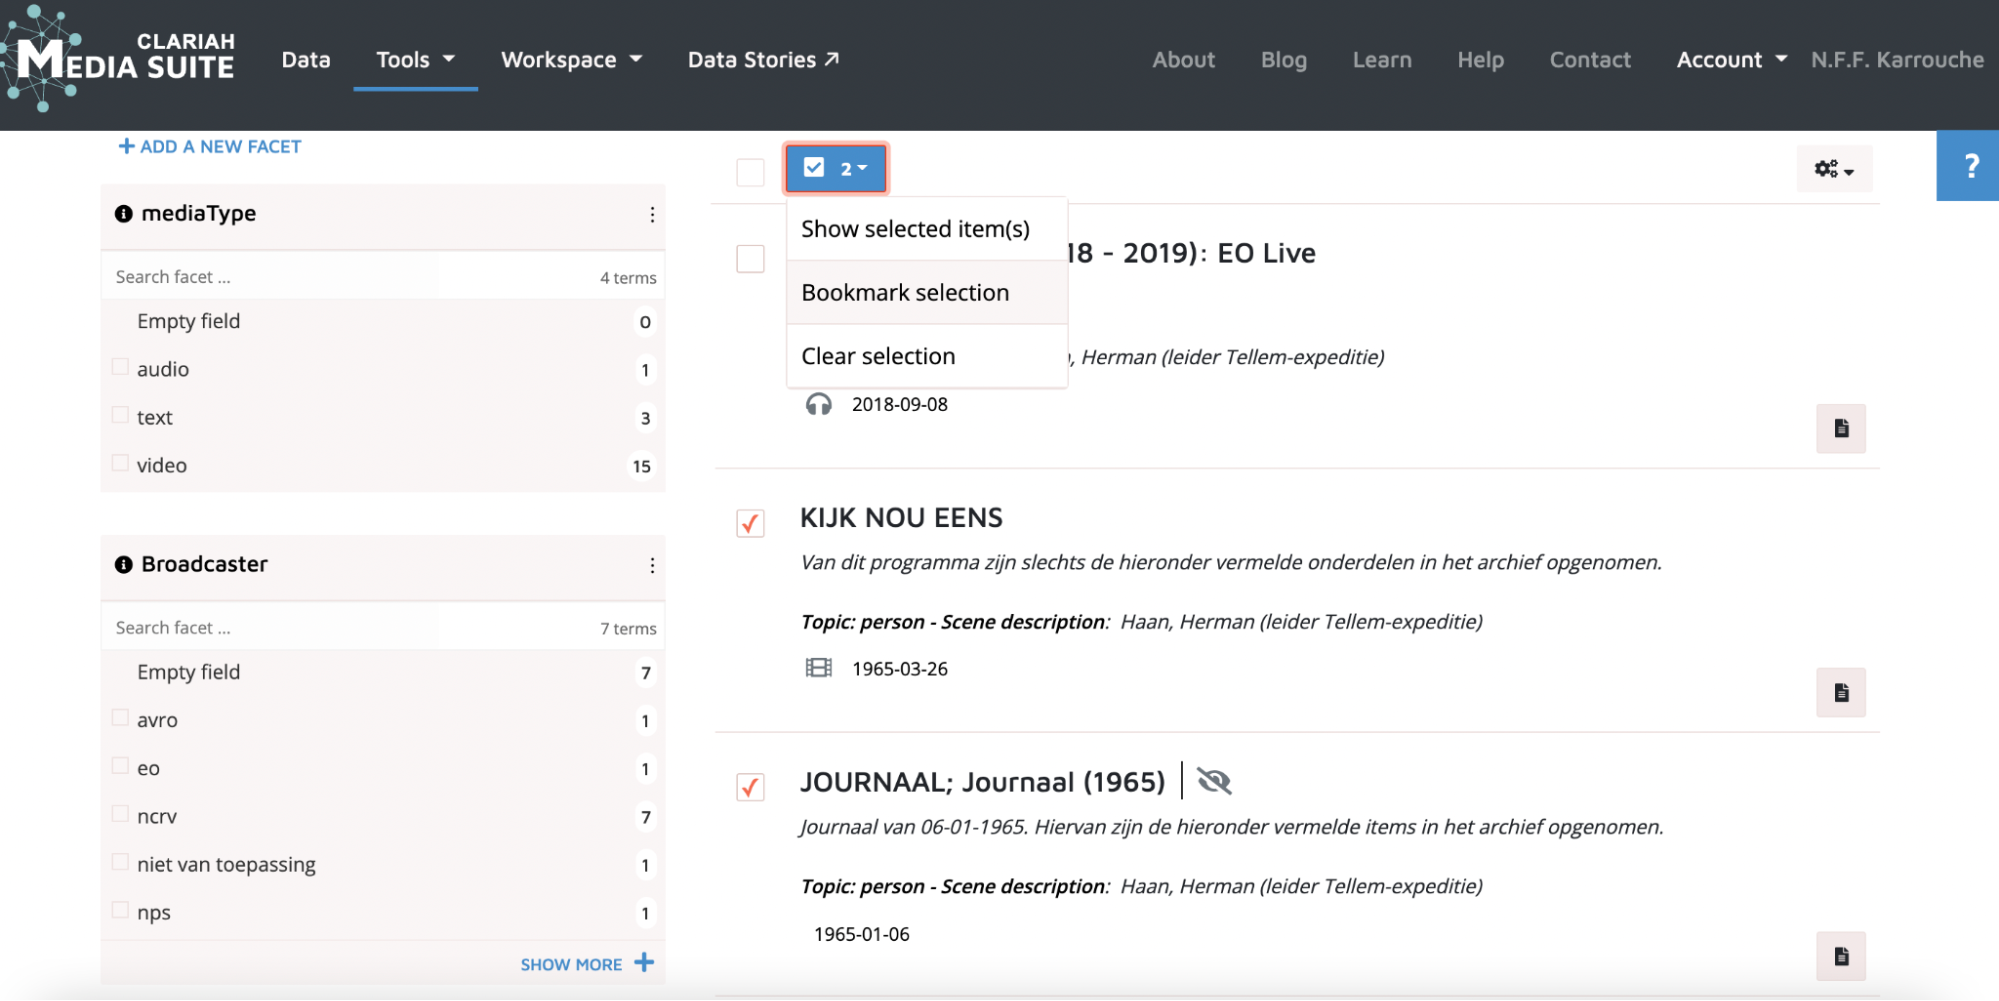
- It is also possible to bookmark multiple search results at the same time . To do this, check the desired items in the search results and press the blue checkmark at the top of the list when you are done. In the small dropdown menu, click “bookmark selection”.
6. Finding items in the National Library Newspaper collection
- Repeat steps 2 until 5 in the Newspaper collection: use the “Search” tool by selecting the “National Library Newspaper Collection” and start entering search terms.
-
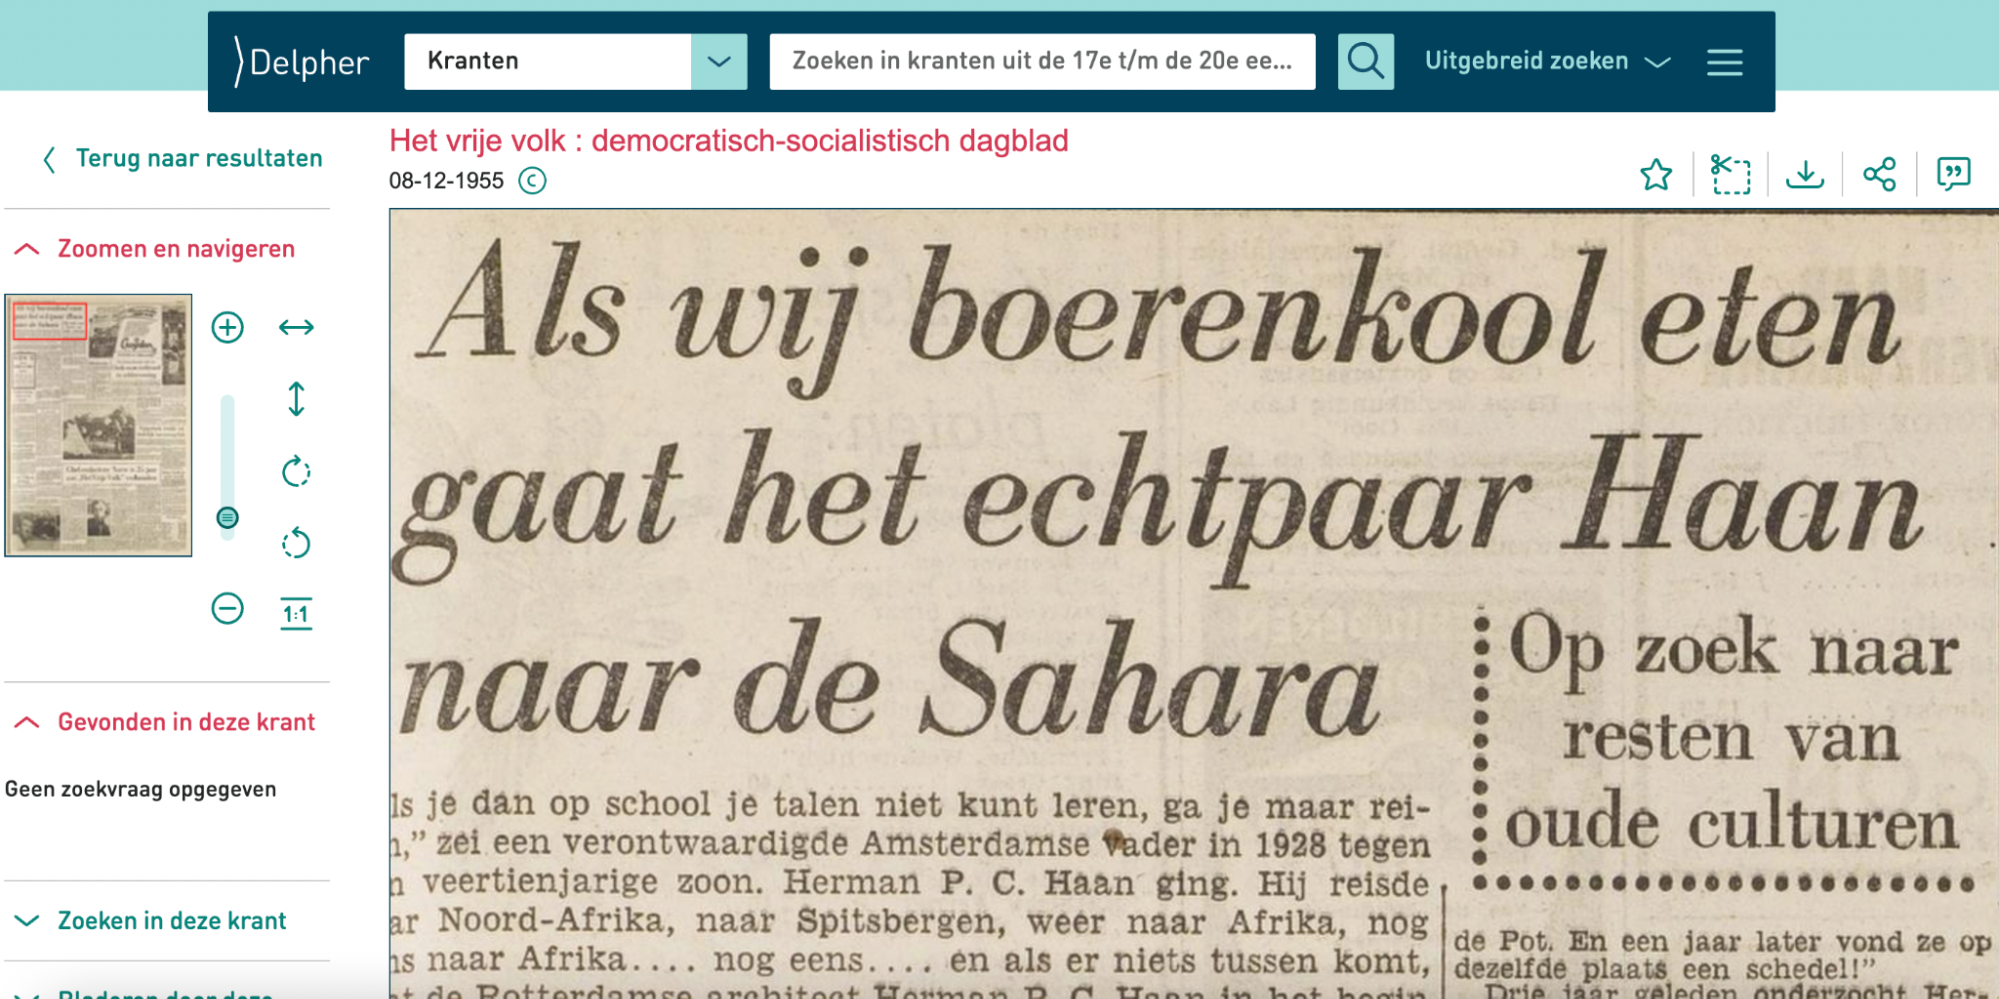
The Newspaper Collection in the Media Suite gives you access to the digitized newspapers in the Royal Library Delpher search engine. While this collection has undergone object character recognition (OCR) processes, its output is available via the Media Suite for search purposes only . To read the OCR, you are redirected to the KB Delpher search engine. You are, however, able to bookmark, save queries and items, and add annotations in your Media Suite workspace, as with an item or query from the Sound and Vision collection.
-
The item in the Media Suite.
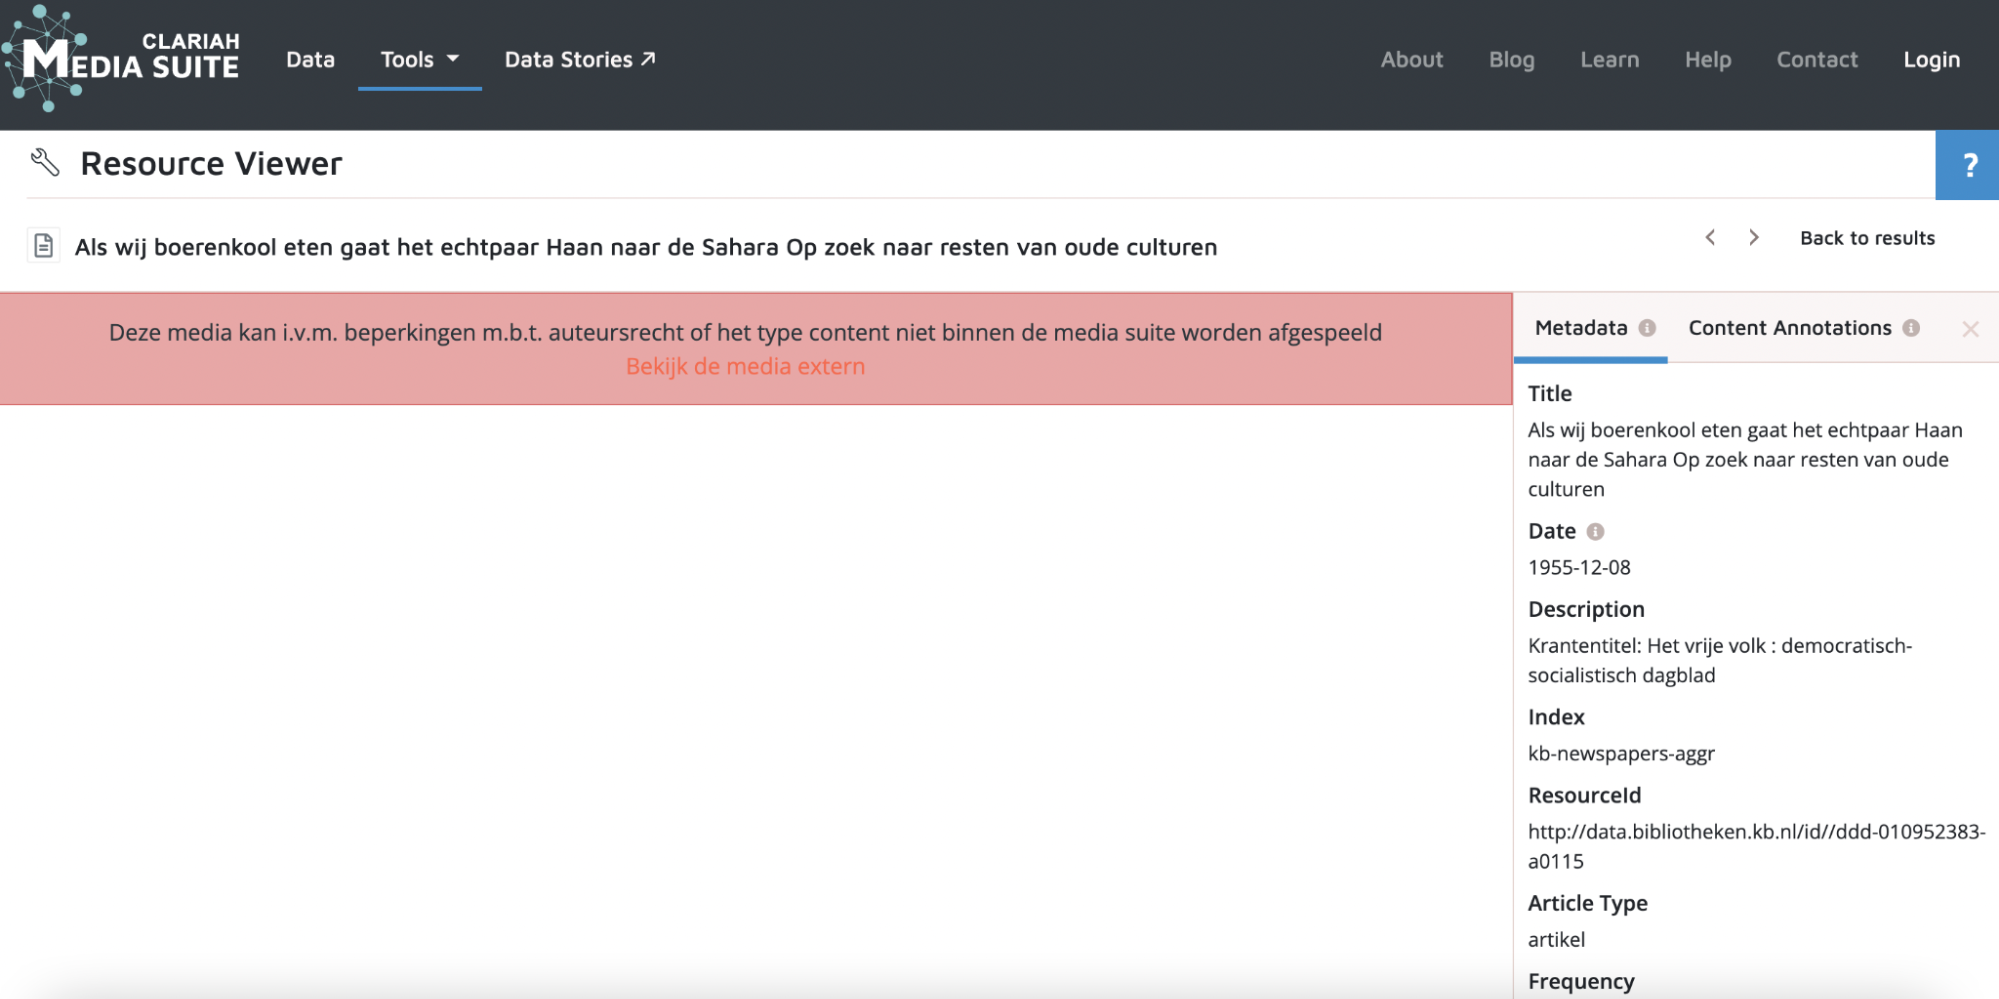
- The Media Suite redirects you to the item including OCR results in Delpher:
Step 7. Exploring your corpus
-
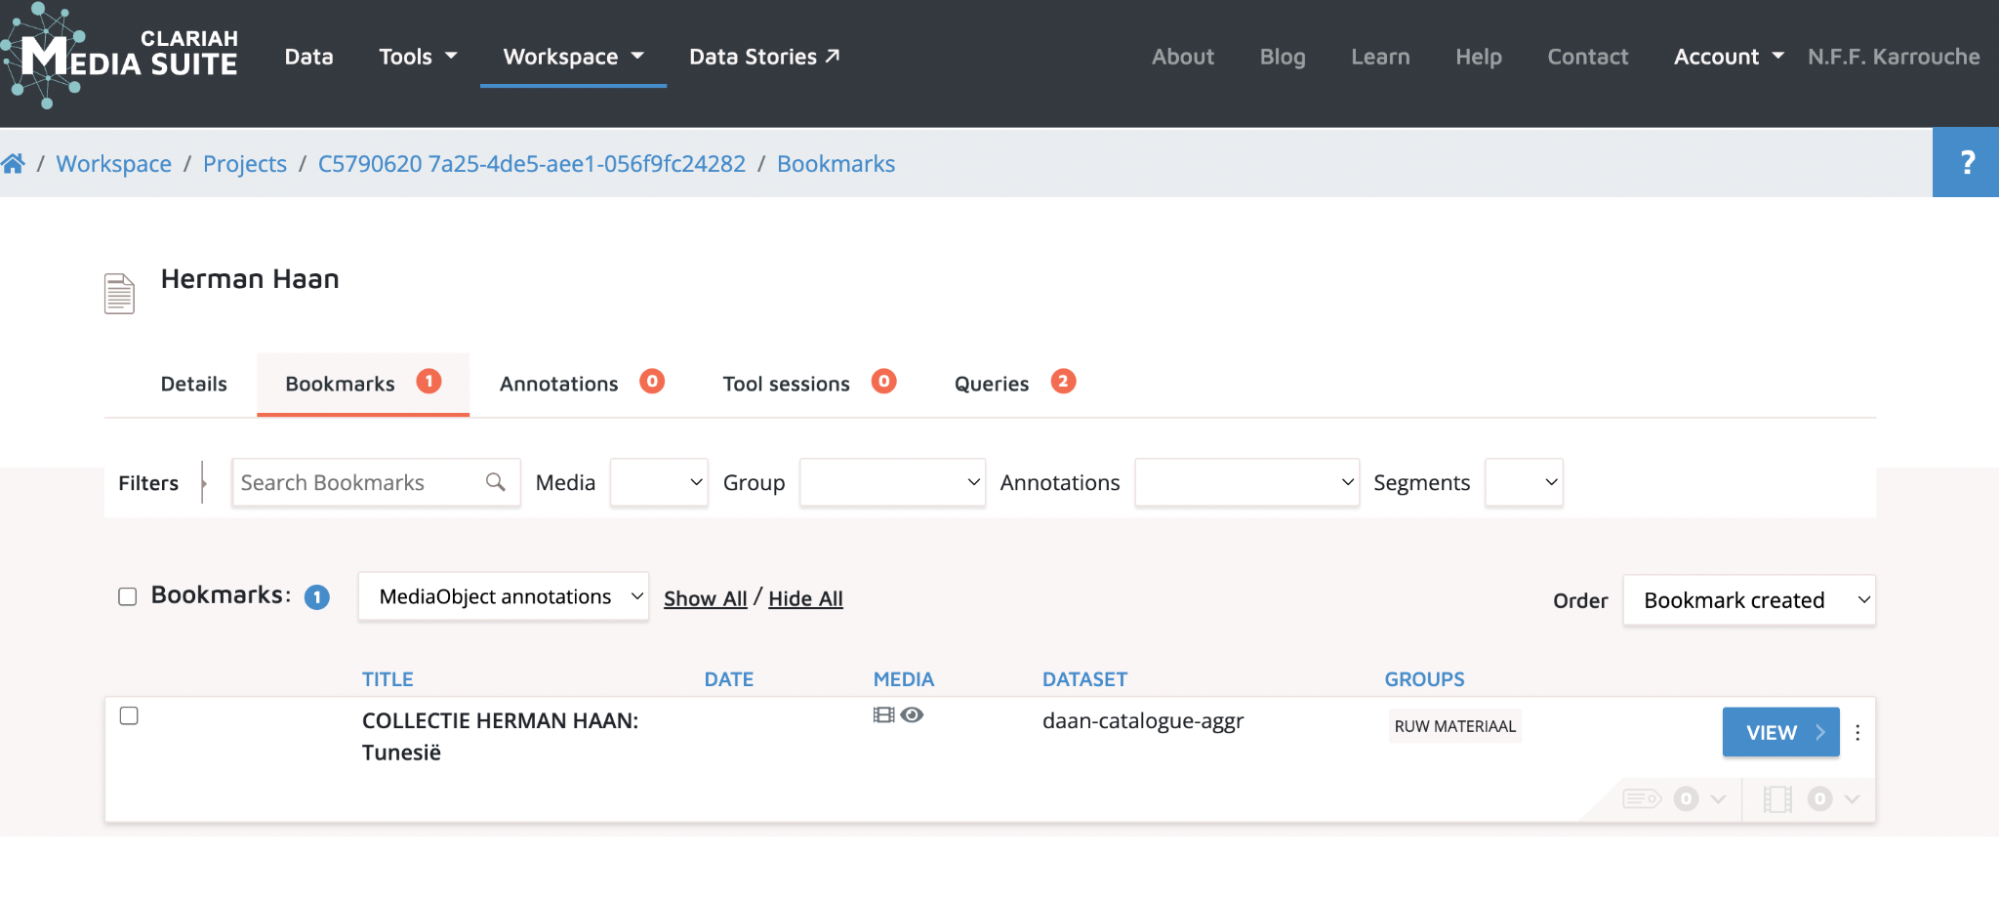
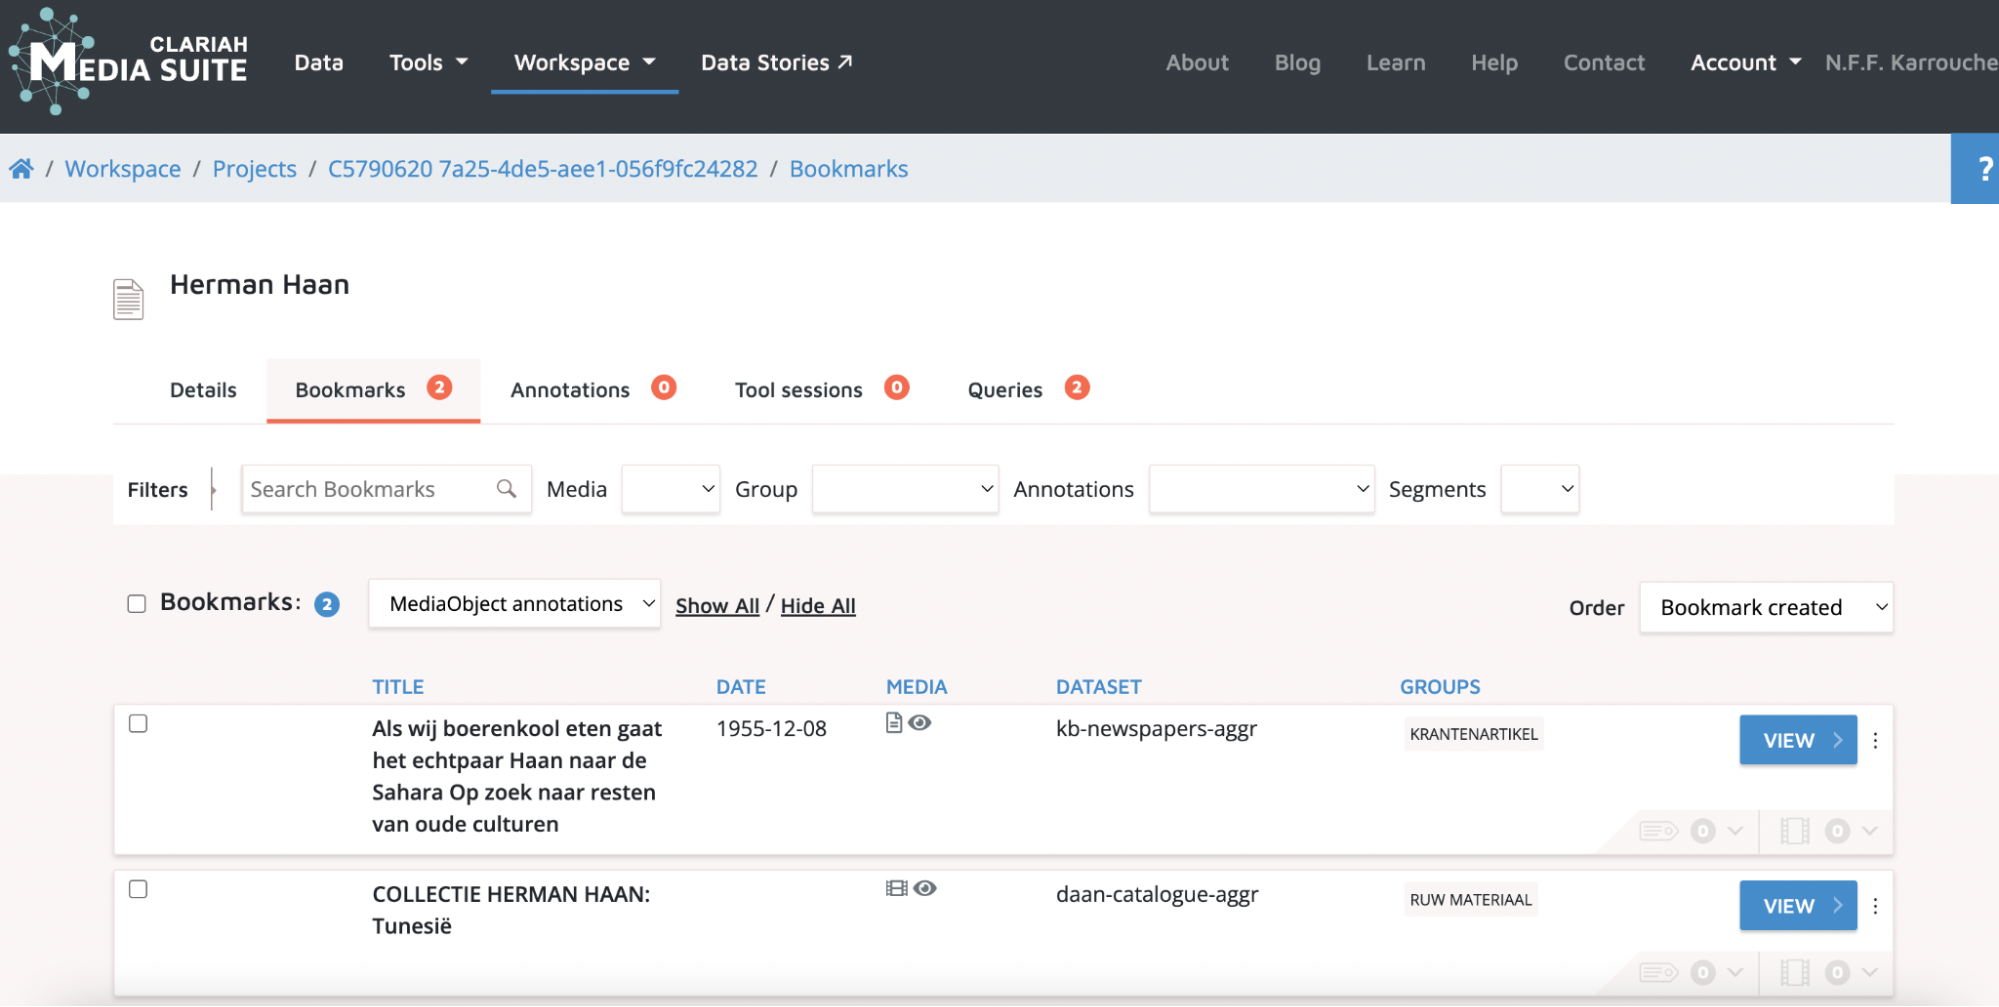
You can start to explore your corpus by accessing the bookmarked items in the personal workspace. Hover over the “Workspace” tab and click on “user projects” . Here you’ll find all of your projects in one place.
-
Now you will see different tabs that are all part of your user project:
-
Details: your own description the user project;
-
Bookmarks: your corpus, all the items you have decided to bookmark in step 3;
-
Queries: the search query or queries you saved in step 4;
-
Annotations: this will be explained in the next step of this tutorial including a link to another tutorial that allows you to explore this in more detail.
-
8. Annotating archival sources
- In the Media Suite, you can also annotate items on item level and on segment level. After completing the steps in this tutorial and compiling your corpus, you may want to start annotating items in your corpus. You can learn how to do this by following steps 4 to 7 in the “Video segmentation, Annotation and Structuralist Film Analysis tutorial” .